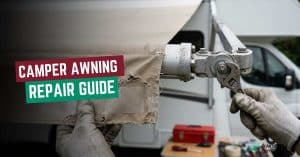


In general, to fix the awning, you need to first clean it, identify the issue, fix it, and then assemble it to make sure it’s working properly. However, with this procedure, you can fix issues like small tears or holes in fabric, loose or sagging fabric, mold and mildew stains, and rusty or loose screws. But when it comes to DIY awning repair, you must know which types of awning issues you can repair on your own.
Well, today we will share how to repair an awning with the common issues and fixes that you can do on your own. All the information has been shared by our technician, Mr. Michael Scott, who has 10 years of experience and has seen several customers who have fully damaged their awning by fixing it alone. Now take a look below and know the truth, and save your money and time.
What tools do you need to repair an Awning?
You only need some basic tools like mild soap, a soft brush, a replacement screw, fabric repair tape/kit, a fabric patch kit, scissors, silicone spray lubricant, a wrench, a ladder, a needle, and others.
However, apart from them, there are some more advanced tools, like HSG-O, #HSG-1-VW, Malco Hand Seamers, and more that have been used by professional awning repair service providers. Now, take a look below and see what tools you need to repair an awning.
- Screwdriver
- Wrench
- Ladder
- Strong outdoor thread
- Needle
- Fabric repair tape
- Fabric patch kit
- Scissors
- Silicone spray lubricant
- Mild soap
- Soft brush
- Replacement screws or bolts
- Waterproof fabric sealant

What are the Common DIY Awning Problems you can fix by yourself?
If you are a beginner, you can fix small awning problems like minor tears or holes, loose or sagging fabric, mold and mildew stains, rusty or loose screws, and simple opening or closing issues. Well, this is our point of view because such issues are minor, and if you understand the process, then you can do it.
But still, as a company, Awning San Diego never inspires you to take risks because a new awning installation costs you more than repair. Now, take a look below, but don’t just read; understand it fully, and then go for it.
1. Small Tears or Holes in Fabric
San Diego mostly has hot, humid weather, where, due to strong UV rays, heat expansion, and dry air, awning fabric will weaken. As a matter of fact, a little bit of strong wind and moisture reduction can make small tears and holes. So, this is a minor issue that you can fix by yourself. First, take the tools below to repair small tears and holes in the awning.
Tools you need to fix small tears or holes in fabric
- Awning repair patch
- Vinyl cement or strong outdoor fabric adhesive
- Awning repair tape
- Scissors or utility knife
- Measuring tape
- Chalk or fabric marker
- Mild soap and water
- Clean cloth or sponge
- Seam roller or flat tool
- Heavy-duty needle and UV-resistant thread
- Ladder
Steps to fix small tears or holes in fabric
Step 1- Clean the Area First: You need to clean the area by using mild soap and water to remove all the dust and dirt. After that, let it dry completely because it will help the patch stick better.
Step 2- Check the Size of the Tear: If the hole size is very small, then fabric sealant is enough to fix it. But for medium and bigger tears, you may need to use patch/repair tape and sew it.
Step 3- Apply Waterproof Sealant: To protect the awning from rain, UV rays and future cracking, you should apply waterproof sealant spray, which will repair small holes.
2. Loose or Sagging Fabric
Due to overextension, material degradation, water pooling, wind damage, heavy damage, loose fixing, and heavy cleaning, these issues are the main reasons for loose and sagging fabric. This is one of the common issues that you can solve by yourself. But if the issue is big, then you should call local awning service providers like Awning San Diego.
Tools you need to fix loose/sagging awning fabric
- Sturdy Ladder
- Measuring Tape
- Cordless Drill/Screw Gun
- Driver Bits
- Adjustable Wrenches
- Flat Blade Screwdriver
- Rubber Mallet or Hammer
Steps to fix a loose or Sagging awning Fabric
Step 1- Inspect the awning: At first, you need to start by analyzing the issue. In this process, you need to keep an eye on a few things, like where the fabric stretched out, whether the bolts or screws are loose, the condition of the spring, and whether the roller tube is bent.
Step 2- Tighten the loose screws & bolts: Most of the time, this thing happens due to loose screws & bolts. In that case, first you need to use a screwdriver and a wrench; after that, tighten all the mounting brackets and supporting arms. You need to check both wall brackets and side arms to solve the issues.
Step 3- Adjust fabric Tension: Now it’s time to adjust the fabric tension. In that case, you need to increase the tension to adjust it.
Step 4- Align the fabric: Last month, we got 10 customer calls from all over San Diego from people who had messed up while realigning them. In fact, among them, two of the customers have damaged their awning arms during alignment.
3. Mold and Mildew Stains
If the awning fabric is trapped in moisture, then mold & mildew stains are very common. This issue happens due to trapped moisture, dirt, and debris, poor airflow, and UV exposure. Well, for this issue, more than fixing, maintenance is necessary. Now, have a look below and know how to fix mold & mildew stains from awnings.
Tools you required
- Soft-Bristle Brush
- Garden Hose
- Bucket
- Microfiber Cloths/Sponges
- Vacuum with Soft Brush Attachment
- Plastic Tarp
- Mild Soap/Detergent
- Specialized Awning Cleaner
- White Vinegar
- Diluted Bleach
- Hydrogen Peroxide
How to fix Mold and Mildew Stains
Step 1- Use a dry brush: For removing loose dirt debris, you should start by removing ordinary dust, but don’t try to rub it forcefully; otherwise, it may go wrong.
Step 2- Wet the awning: Now, wet the awning with cold water to soften the stain and mold.
Step 3- Apply & Scrub: Now it’s time to apply the scrub gently and use a soft-bristle brush to scrub it.
Step 4- Clean the awning: After scrubbing, it’s now time to rinse the awning; in this process, you need a garden hose, which will remove the residue properly.
Step 5- Let it dry: After completing the whole process, it’s now time to let it dry completely.
4. Rusty or Loose Screws
Due to strong wind vibration, repeated use, structural movement, Over-torquing during Installation, and weak anchor points, loose screws are the main reason for loose screws. On the other hand, moisture exposure, galvanic corrosion, coastal environments, and damaged coatings are the main reasons for rusty screws. Well, this is the simplest job that you can do by yourself to repair an Awning.
What tools do you need to fix the rusty or Loose Screws Awning?
- Screwdriver
- Power Drill with Screwdriver Bits
- Replacement Screws (Stainless Steel)
- Rust Remover Spray
- Wire Brush
- Pliers
- Wrench or Socket Set
- Silicone Sealant
- Ladder
- Protective Gloves
How to fix Loose or Rusty Screws?
Step 1- Remove the rusty screw: Well, when you notice any sort of rusty screw, then immediately. After that, apply penetrating oil and let it soak for about 10–15 minutes.
Step 2- Cleaning: Now, you need to have a wire brush and sandpaper to remove rust from the frame around the hole.
Step 3- Prevention: After removing rust, you can apply rust-inhibiting primer or weather-resistant paint to the area before attaching it again.
Step 4- Replace & Remove: You should always remove the old screw if there is no scope to fix it.
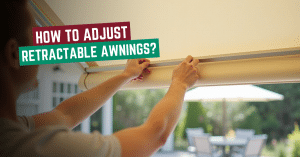
5. Awning Not Opening or Closing Properly
As we know, there are several types of awnings available, but among them, you cannot fix all of them, especially those that are motorized. No, we are not discouraging you; if you have the skill, then do it. Last time, one of our experts, Steve, saved $2500 for clients, which was previously impossible. Awning issues mostly happen due to lack of lubricant, dirty tracks, misangled arms, fabric issues, or stripped gears.
What Tools are required to fix the awning opening & Closing issue?
- Screwdriver
- Power Drill with Bits
- Allen Wrench
- Wrench or Socket Set
- Lubricant Spray
- Pliers
- Replacement Crank Handle
- Multimeter
- Step Ladder
- Cleaning Cloth
Steps to repair awning opening & Closing issue
Step 1- Check the crank handle: First, inspect the crank handle; first check the loose component, then skip the gears and look for obstructions and identify the issue.
Step 2- Inspect the Arms and Joints: You need to check for bends/deformities, rust & corrosion, fasteners, and mount brackets for arms. On the other hand, in awning joints, you need to check pivot points, operations, and alignment to make sure of the inspection.
Step 3- Clean the moving parts: Now you need to clean the moving parts and wipe the frame and joints with a clean cloth.
Step 4- Use Lubricate the Mechanism: Now use lubricant spray to ease all the joints and moving points. After that, move the parts slowly to release the jam.
Step 5- Tighten & loosen the screw bolts: Before final finishing, tighten and loosen all the bolts and screws, which will make sure that the awning is proper without any obstacles.

When should you call a professional awning repair service provider?
If there are any structural, mechanical, or massive fabric issues or warranty fixes, then you should call a professional awning service provider in San Diego. In fact, if there is any issue you observe and don’t have a solution for, then you should call a professional. Now let’s have a look below and know in which situation you should call a professional.
- Extensive Fabric Damage
- The Awning is Not Opening or Closing at All
- Structural Damage to the Frame
- Motor/Mechanical Failures
- Extensive Fabric Damage
- Water Leakage or Structural Damage
- Awning Is Pulling Away from the Wall
- You Feel Unsafe Doing the Repair
- Warranty Service
How to extend the life of an awning?
To extend the lifespan of an awning, you should try cleaning the awning regularly and avoid closing it when wet, retract it during strong winds, tighten the screws and lubricate the parts. However, in short, if you take care of your awning and maintain it perfectly, then your awning will last longer. Now, take a look below and know what steps you should follow with simple instructions.
- Clean It Regularly: To clean the Awning use a soft brush for dry removal. However, if the dirt is strong, then prepare a solution, scrub the fabric, washout and then rinse it completely.
- Avoid Closing It When Wet: After raining or washing out, never retract instantly. This step makes the awning moist and damages it early. Always clean the awning properly and make sure it is fully dry and ready to retract.
- Retract During Strong Wind or Storm: Always retract the awning in a storm; otherwise, it will damage the awning fabric as well as other parts.
- Tighten Loose Screws and Bolts: Check at least once a month and fix them with proper tools. But never overtighten them; otherwise, they might be broken.
- Lubricate Moving Parts: To ensure every part is moving smoothly, always lubricate the moving parts.
- Trim Nearby Trees: This can damage your awning, so if there are any trees nearby, then trim them to ensure they don’t damage the awning.
- Repair Small Damage Quickly: If there are any small holes or sagging in the awning, then immediately fix it because this
FAQs
How much does it cost to repair an awning?
On average, for repairing an awning, you may need to spend around $250-$1250. But it totally depends on the type of service. However, for small fixes, you may only need to pay around $25-$100.
Can I replace the awning fabric myself?
To replace the awning, you must gain some abilities like measurement and physical strength, technical expertise & experience, and basic tool proficiency. Moreover, you should have the necessary tools to make sure it is perfectly aligned.
How to seal a leaking awning?
To seal a leaking awning, first need to clean the surface, then apply polyether sealant or silicone caulk to gaps and cracks for a permanent fix, ensuring it is UV-resistant. For temporary or quick repairs on aluminium awnings, use aluminium sealing tape. For fabric, use specialized repair tape or re-waterproof with a suitable sealant.
Think twice before taking any step
So, we hope now you know how to repair an Awning and what types of awning issues you can repair. But the main thing is we never suggest you do DIY awning repair until you have experience or you are confident enough. It’s your money, which you earned after a long, hard work. So think about it twice before taking any step. For any assistance, you can call us anytime.