

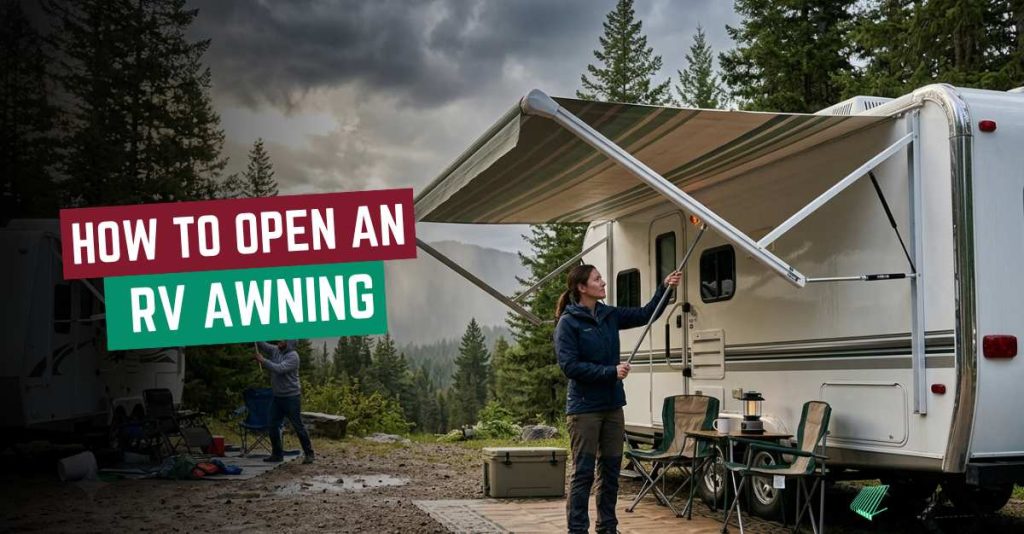
To open an RV awning, first release the travel locks and loosen the rafter knobs. Flip the ratchet lever to open, then pull the fabric out smoothly using the strap and rod. Lock the arms in place, raise the support legs, and adjust one side lower for proper rain runoff and stability.
Most first-timers open their RV awning wrong on the very first try. They skip a safety check, forget to release a travel lock, or pull the fabric the wrong direction. We have seen this happen more times than we can count. This guide fixes that. Follow it once, and you will get it right every time after.
If you go through this guide, you’ll clearly understand RV awning types, step-by-step opening for manual and electric systems, key differences between both, plus essential safety tips, troubleshooting insights, and expert pro strategies for smooth, damage-free operation every time.
Types of RV Awning System
RV awnings typically come in two types- 1. manual and 2. electric. Both use support arms, roller tubes, fabric, and locking mechanisms, but the opening process differs. Knowing your awning type helps prevent damage, improves safety, and makes setup faster and easier.
Your RV awning has four parts. Know these, and the rest makes sense. The roller tube runs along the side of your RV. The fabric wraps around it. On one end of the tube, you will see the ratchet lever. That small lever controls roll direction. Flip it one way to extend, the other way to retract.
The rafter arms fold out from the top. They slide and lock when you open the awning. Below them, the support arms are the two vertical legs that actually hold everything up off the ground.
Both support arms have travel locks at the base. These pins or latches keep the awning from creeping open on the road. Release both before you do anything else. That is the whole system. Manual awnings need a rod or crank handle to operate. Electric awnings use a motor controlled by a switch or a remote.
Safety Checks Before Opening an RV Awning
We have seen awnings rip, arms buckle, and fabric tear because someone skipped a 60-second check. Do not let that be you. Run through these before every single setup.
Check the wind: If you can feel a steady wind on your face, wait. Even light wind can strain the awning fabric and arms. Calm conditions are safest for operating an RV awning.
Look for overhead obstructions: Low branches, power lines, and roof vents can catch the awning roller tube as it swings out. Look up and ensure enough clearance before you start.
Level your RV: First, use leveling blocks or jacks to stabilize your RV. An unlevel RV puts uneven stress on one support arm every time you use the awning.
Close the RV door: The door swings into the path of the awning on many rigs. Close it before you pull the fabric out, or you will hit it mid-extension.
Grab your awning rod: Keep it in hand before you start. You will need it to flip the ratchet lever and hook the pull strap.
Check the fabric: Look for tears, mold spots, or debris from the last trip. A damaged section of fabric gets worse under tension.
Pro Tip: Get into the habit of running this check as soon as you park. Do it before you even go inside. It only takes a minute, and it protects a piece of equipment that can cost several hundred dollars to replace.
How to Open a Manual RV Awning (Step-by-Step)
Manual awnings are the most common setup on camper trailers and older rigs. Run through it a few times, and you will have it done in five minutes flat.
Pre-Step: Before You Touch Anything
Check the wind. Look up for branches and powerlines. Close the RV door. Grab your awning rod. Four things. Most people who damage their awning skipped one of these.
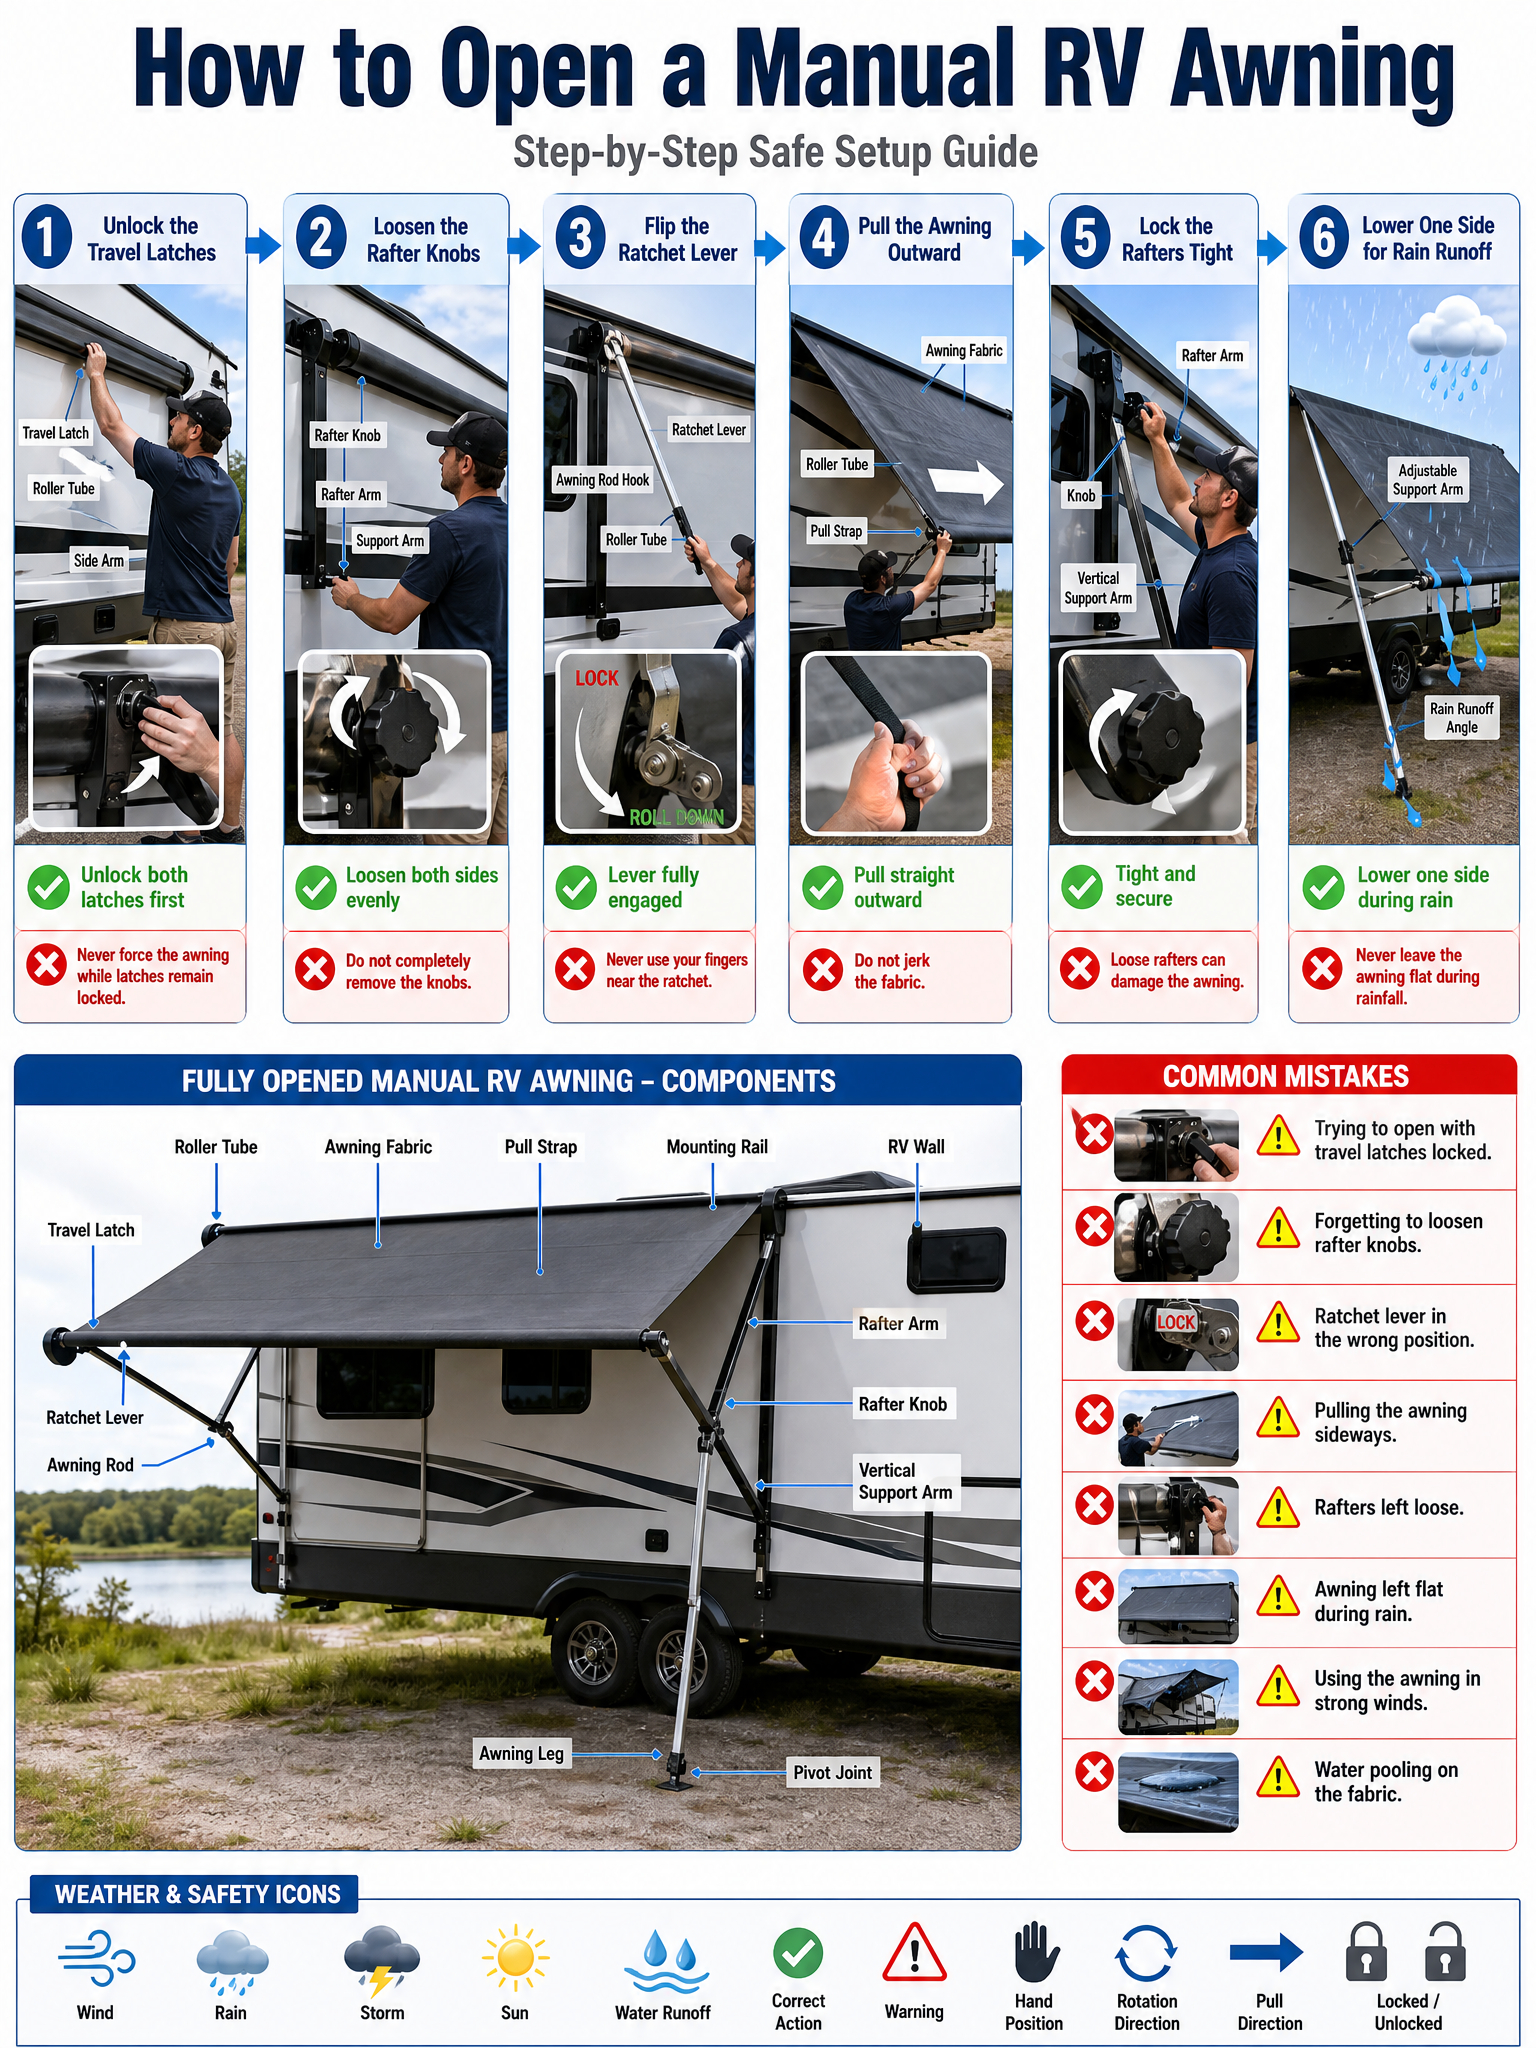
Step 1: Release The Travel Locks On Both Arms
Walk each end of the awning and find the travel locks on the support arms. Spring-loaded pins or sliding latches, usually. Push or slide them open on both sides. If you only do one side, the arm will not drop cleanly, and you can bend it trying to force it.
Step 2: Loosen The Rafter Knobs
Both rafter arms have round knobs. Turn them counterclockwise, loose enough so the arm slides. Do not remove them. Skip this, and the rafter arm will not move at all in the next step.
Step 3: Flip The Ratchet Lever To The Open Position
There is a small ratchet lever near one end of the roller tube on your RV wall. Hook it with your awning rod and flip it toward the roll-out direction. The tube usually has an arrow. Get this backward, and the fabric will either not unroll or go the wrong way entirely.
Step 4: Pull The Strap And Walk The Fabric Out
Hook the pull strap on the outer edge of the fabric with your rod. Walk backward at a steady pace. The fabric unrolls as you go. Keep even tension, no yanking. Stop when the fabric is fully out, and the support arms sit near the ground.
Step 5: Click The Rafter Arms Up, Pull Taut, Tighten
Slide both rafter arms up their track until you hear or feel the click. Push the outer bar out slightly to pull the fabric tight and even. Then turn both rafter knobs clockwise until snug. A loose awning sags in the middle, catches wind, and wears out unevenly.
Step 6: Raise The Legs And Tilt For Rain
Bring both support arms up to the same height. Then drop one side, usually the outer edge, by one notch. That angle sends rain off to the side. A flat awning collects water fast, and the weight will stress the arms.
Note on Crank Handle Models: Older crank handle models: Insert the handle into the manual override shaft on the roller tube and turn in the “open” direction. Everything else is the same.
How to Open an Electric RV Awning
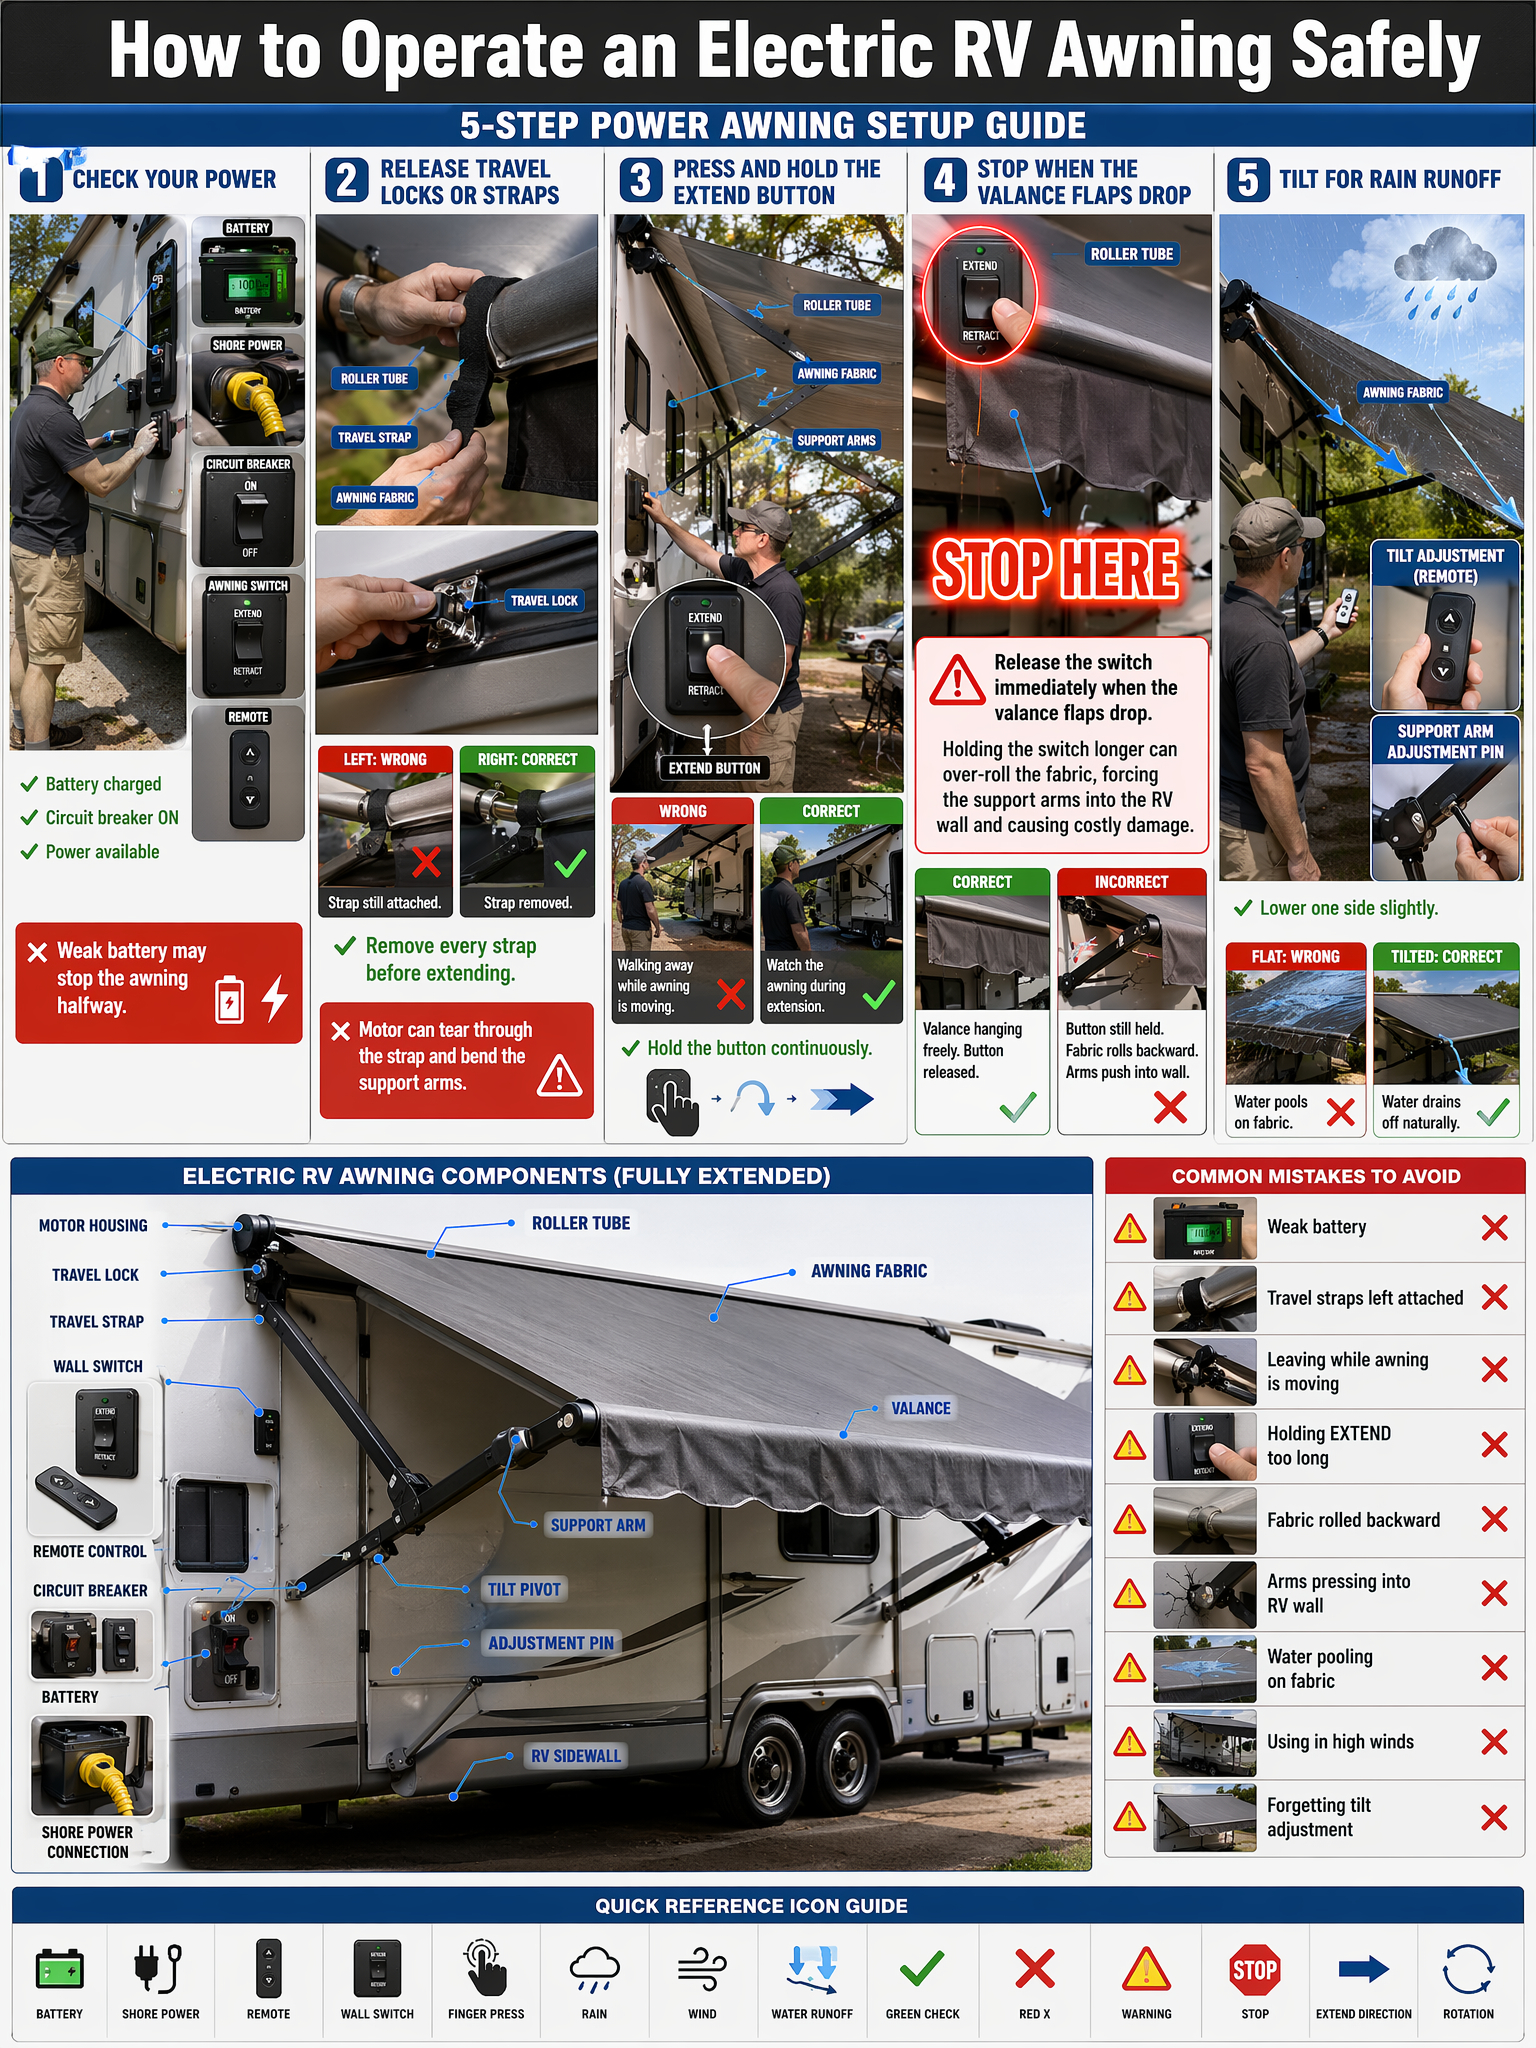
To open an electric RV awning, check the power, release the travel locks, and hold the extend button while watching the fabric roll out. Stop immediately when the valance flaps hang down, then tilt one side slightly for rain runoff.
Electric awnings are faster than manual ones. Not foolproof. We have seen people roll the fabric backward just by holding the button too long. Follow these steps, and you will get it right.
Step 1: Check Your Power
Shore power or a charged battery. That is your starting point. A weak battery can stop the awning halfway or keep it from moving at all. Find the awning switch or remote, then make sure the circuit breaker is on.
Step 2: Release Travel Locks Or Straps
Walk both ends of the roller tube. Some awnings still use velcro straps or travel locks to hold the fabric during transit. Release them before you touch the button. The motor will tear through a strap. It will take the support arm with it when it does.
Step 3: Press And Hold The Extend Button
Hold it and watch the awning roll out. Stay on it the whole time. Do not walk away.
Step 4: Release The Moment The Valance Flaps Drop
The valance flaps are the small tabs along the bottom edge of the fabric. When they drop and hang freely, the awning is fully extended. Let’s go right there. Hold past that point, and the fabric rolls backward over the tube. The arms push into the RV wall. That cracks the siding.
Step 5: Tilt It So Rain Runs Off
Most power awnings have a tilt button on the switch or remote. Lower one side slightly. If yours does not have that function, adjust the support arm pins by hand. Your owner’s manual shows the right pin position.
Remember this: do not hold the button until the motor stops on its own. That stop is a mechanical hard limit, not a signal that the awning is correctly out. Watch the flaps. Stop there.
Manual vs Electric RV Awning
| Feature | Manual RV Awning | Electric RV Awning |
| How it opens/closes | Pull the strap or hand crank, and physically extend it | Push the button or remote motor to open and close it |
| Setup time | 5-10 minutes | 1-2 minutes |
| Tools needed | Awning rod or crank handle | No switch or remote |
| Power required | None | Yes, battery or shore power |
| Cost | Lower | Higher |
| Ease of use | More physical effort | One button |
| Wind resistance | Higher arms can be locked and staked into the ground | Lower arms sway and can flip or buckle in strong winds |
| Rain handling | You can tilt it to let water run off one side | Some models dump one arm automatically to shed water |
| Failure risk | Lower the number of moving parts | The motor can fail |
| Manual override | Built in | Available via manual override shaft |
| Maintenance | Simple awning maintenance | Simple awning plus motor needs inspection |
| Price range | About $200-$800+ upfront. | About $800-$2,500+ (often more). |
| Best for | Budget campers, dry climates, off-grid, windy areas | Resort campers, frequent campers, easy setups, limited mobility |
Common RV Awning Problems & Quick Fixes
Most awning issues come down to a handful of familiar causes. We see these regularly in our work. Here is what to look for and how to address it.
| Problem | Likely Cause | Quick fix |
| The awning will not open | Travel lock still engaged or low battery | Release travel locks, check battery charge, and the breaker |
| Stuck awning midway | Jammed roller tube or stripped gear | Stop immediately, use the manual override shaft with the crank handle, and inspect the roller tube for debris |
| Fabric sags in the center | Rafter knobs not tightened or arms not clicked in | Re-check that rafter arms clicked, tighten knobs fully, and pull fabric taut |
| Water pooling on fabric | No rain pitch set | Lower one support arm to create a runoff angle, let water drain off the side |
| Awning rolled backward | The button was held too long on the electric awning | Press retract briefly to unwind, then re-extend and stop when the valance flaps drop |
| The arm will not lock in place | The ratchet lever is in the wrong position | Release the knob, reposition the arm, check the ratchet lever direction, and re-lock |
| Fabric tears during opening | Debris caught in the roller tube or fabric damage not caught | Retract slowly and inspect the roller tube and the full fabric surface before trying again |
Tips to Prevent RV Awning Damage
Good awning care is mostly a habit. These cost nothing and add years to the fabric.
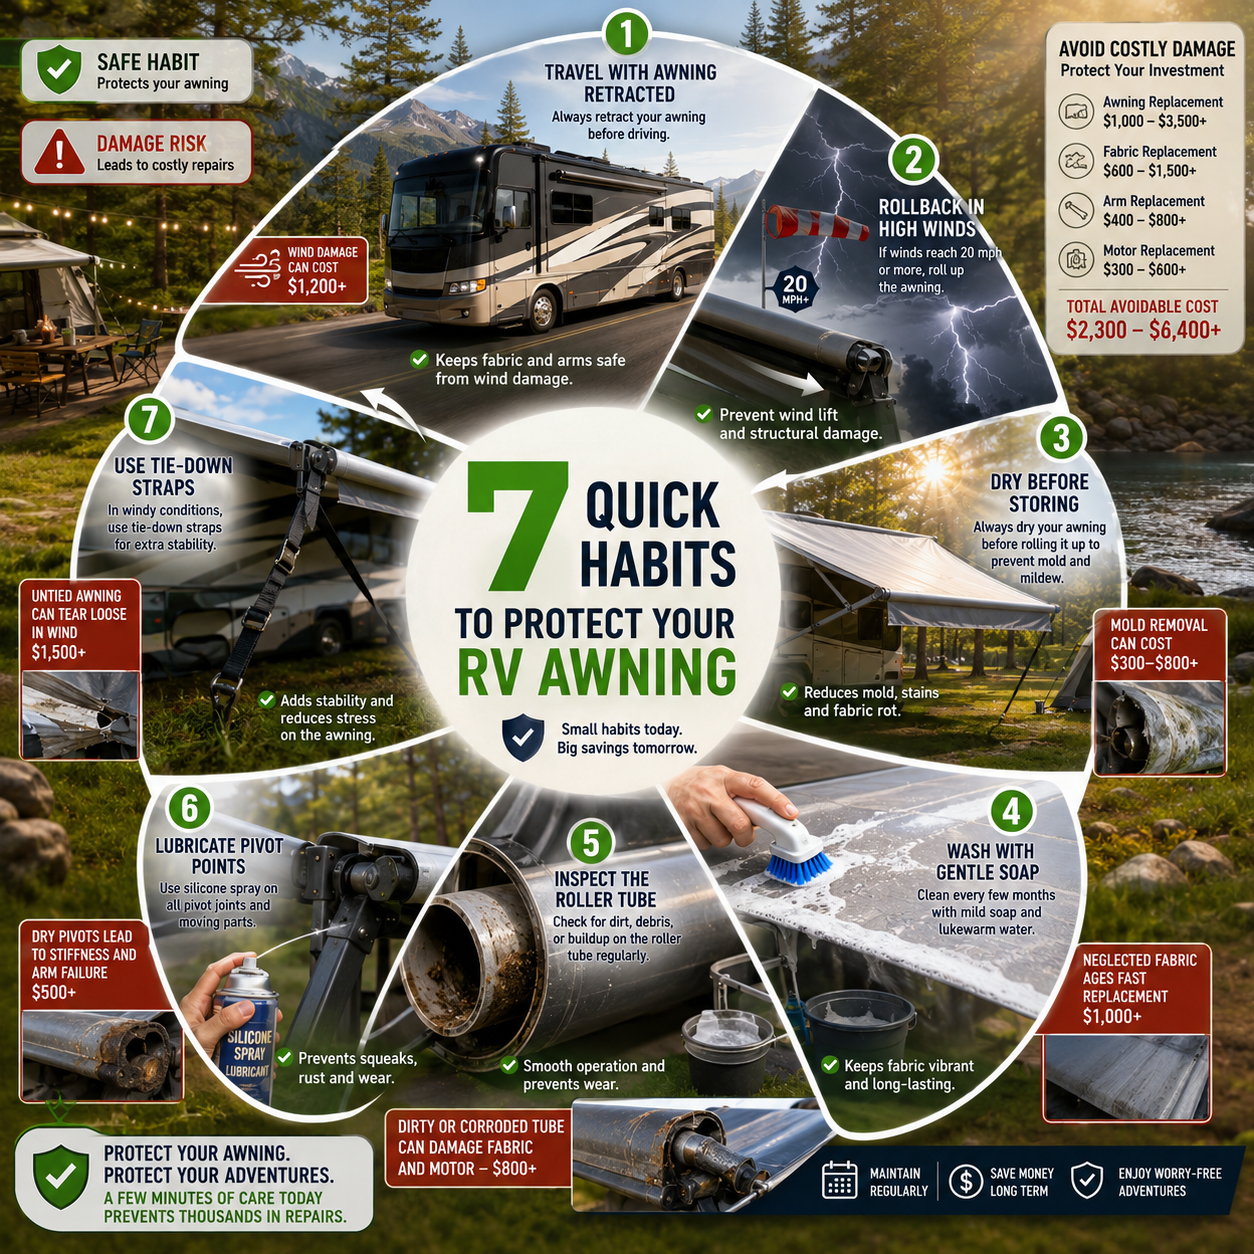
Retract before you drive: Any movement can catch the wind. Lock the travel locks. Every single time.
Wind above 20 mph? Roll it in: Awnings are not made for sustained gusts. When it picks up, put it away.
Never roll up a wet awning: Mold grows fast inside a rolled-up wet awning. Open it after rain, let it dry completely, then retract.
Wash it twice a year: Soap and water. No bleach on vinyl or acrylic. Clean fabric stays flexible longer.
Check the roller tube every season: Cracks, rust, or buildup cause uneven rolling. Catch it early.
Lubricate the arms once a year: Apply silicone spray to pivot points and the ratchet lever. Keep it off fabric and plastic.
Use tie-down straps in windy regions: They anchor the arms and reduce swaying when you leave the awning out.
Common Mistakes to Avoid
These are the ones we see most often. Knowing them ahead of time saves a repair call.
- Not checking before you open. Branches and hidden obstructions constantly catch people off guard. Look first.
- Door left open. On most trailers, it swings right into the awning. Close it before you extend.
- Holding the electric button too long. It reverses the fabric. Watch the valance flap drop, release right away.
FAQs
How Do I Know When It’s Safe To Open My RV Awning?
Feel the air. If the wind is moving, wait. No wires or branches overhead, RV level- you’re good.
Can All RV Awnings Be Opened The Same Way?
No. Manual ones use a crank or rod. Electric ones use a button or remote. Read your manual before the first setup.
What Should I Inspect Before Opening An RV Awning For The First Time On A Trip?
Check the fabric for tears or mold. Make sure the travel locks slide free. On electric, confirm the battery is charged.
Is it safe to open an RV awning if the ground is uneven?
Level the RV first. Uneven ground puts all the weight on one arm. That bends the arm and cracks the bracket.
What Causes an RV Awning to Stop Halfway While Opening?
Dead battery, a travel lock still holding, or something in the roller tube- Stop. Do not force it. Check each one.
Do I Need To Adjust The Tension After Opening an RV Awning?
On manual awnings, yes. Once the arms lock, pull the fabric tight and turn the knobs down. Slack fabric catches the wind and wears fast.
Can I Open My Rv Awning In Light Rain, Or Should I Wait?
You can, but tilt one arm lower right away. Water needs somewhere to run. A flat awning fills up and comes down.
Why Does My RV Awning Make Noise When Opening?
Grinding means a dry roller. Popping is stiff fabric from storage. Metal scraping means an arm is catching its track. No sound from the electric means a motor or power problem.
How Often Should I Test My RV Awning If It Is Not Used Regularly?
Every 60 days, open it fully and bring it back in. You will catch mold or damage before it becomes a full replacement.
Still Not Sure Which Awning Setup Is Right for You?
We get it. Choosing between manual and electric, figuring out the right size for your rig, or dealing with a stuck awning that just will not cooperate- these things are frustrating on your own.
Our Awning San Diego team frequently works with RV owners. We know what works and what causes problems down the road. If you want a second set of eyes on your setup or need professional installation and repair, we are here for that.
You should be relaxing under your awning, not wrestling with it. See all our Awning Services.