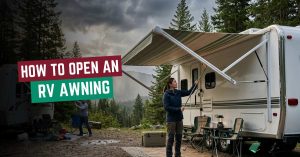


SunSetter awning installation is the process of mounting a retractable, lateral-arm SunSetter awning to an exterior wall, roof, or soffit. It creates adjustable shade for patios, decks, and outdoor living spaces.
Installing a SunSetter awning isn’t hard, but it’s unforgiving. Miss the bracket height by an inch, or skip the level check, and the whole thing sits crooked for years. We’ve mounted these on vinyl, stucco, and brick walls all over San Diego, and the same few details separate a solid install from a wobbly one.
Here, we will walk you through tools, measurements, step-by-step mounting, surface-specific tips, common mistakes we see in the field, and when it makes sense to call a professional.
What to Know Before Installing a SunSetter Awning
A SunSetter awning takes two to three hours to install and needs two people, four-inch lag bolts into wall studs, and a mounting height of about nine feet for the best shade coverage. Most homeowners with basic tools can do it in an afternoon. Anyone working alone, on stucco, or above a second story should call a professional installer instead.
Most SunSetter models rate as a moderate DIY job. The actual mounting takes two to three hours once you have your tools laid out and your wall marked. The hardest part is not the awning itself. It is finding solid studs, drilling straight pilot holes, and lifting roughly 200 pounds of awning into the brackets without dropping it.
DIY vs Professional Installation
| Factor | DIY Installation | Professional Installation |
| Time needed | 2 to 3 hours, plus planning | 1 to 2 hours, often same day |
| People required | 2 to 3 | 2 installers, no help from you needed |
| Cost | Tool rental only, if needed | $100 to $400 added to the awning price |
| Risk level | Higher, especially on stucco or brick | Lower, installer carries the liability |
| Best for | Vinyl or wood siding, ground-floor walls | Stucco, brick, second-story, motorized units |
We have mounted hundreds of these awnings across San Diego County, and the homeowners who save the most money are the ones who know their wall type before they start. The ones who call us mid-project usually hit a stud they couldn’t find or a stucco wall that needed a different bolt entirely.
SunSetter Installation Requirements
San Diego homes need solid wall studs or masonry behind the mounting brackets, a flat surface at least as wide as the awning, and clearance from doors, windows, and downspouts.
Most patio covers under 300 square feet are exempt from a building permit in the City of San Diego, but anything attached to the home, located in the Coastal Zone, or sitting on environmentally sensitive land may require one.
HOA approval is common in planned communities like San Marcos and Chula Vista, so check your HOA rules before you drill.
Tools and Materials Needed
| Essential Tools | Optional Tools | Safety Equipment |
| Power drill with 1/4″ bit | Stud finder with deep scan | Safety glasses |
| Socket wrench set | Laser level | Work gloves |
| Chalk line or string | Masonry drill bit set | Sturdy ladder, rated for two people |
| Tape measure | Caulk gun for sealing | A helper to spot the ladder |
| Standard level | J-channel flashing (vinyl siding) | Knee pads, if working on a deck |
| Pencil | Shims for uneven walls | Hearing protection if hammer drilling masonry |
How to Measure and Choose the Right SunSetter Awning
Measure your wall width first, then size your awning one to two feet narrower so the arms clear nearby windows and trim. Mount at nine feet if your wall allows it. That height gives you about 6.5 feet of clearance once the awning is fully extended.
How to Measure
- First, measure wall-to-wall across the area you want shaded.
- Then subtract 1 to 2 feet from that number. This keeps the arms clear of windows, trim, or doorframes when the awning opens.
- Mark your mounting height. Nine feet is the standard SunSetter recommends for the best balance of shade and headroom.
- Now check the drop. SunSetter awnings have a 29-inch pitch built in at the factory.
- Mount at nine feet, and your front bar will sit around six and a half feet high when fully extended. That’s enough clearance for almost anyone walking under it.
How to Choose
- Pick a manual for simple shade. A hand crank works fine if you’re not opening and closing it often.
- Pick motorized for convenience. One button does the job, and most homeowners prefer it once they’ve used it.
- Pick a wind sensor model if you’re near the coast. Spots like Oceanside or Corona Del Mar get sudden gusts. A wind sensor retracts the awning before that becomes a problem.
- Size down slightly in windy areas. A smaller awning holds steadier in open coastal wind than a wide one.
Pre-Installation Planning (Critical Steps)
Check the wall: Look for studs, bows, or swells before marking anything.
Clear the path: Make sure there are no light fixtures, downspouts, or window trim where the brackets will go.
Know your wall type: Wood, vinyl, and stucco each require different fasteners and pilot-hole depths.
Set your height now: Mark nine feet, or your chosen height, before you touch a drill.
Line up a second person: The awning is too heavy and awkward to lift alone.
Check HOA and permit rules: Confirm this before drilling if the awning attaches to the structure.
Lay out every tool first: Have all fasteners and tools from the box ready so you’re not searching mid-install.
How to Install a SunSetter Awning Step-by-Step

Installing a SunSetter awning involves measuring the mounting area, securing wall brackets to structural framing, lifting the awning into place, and adjusting the pitch for proper shade and water runoff.
Most installations require two to three people due to the awning’s size and weight. Here is how each step works.
Step 1: Confirm Measurements and Mark Bracket Height
Before touching the wall, go back to your measurements. Check that the wall width matches your awning size. Look for windows, trim, or fixtures that might conflict with bracket placement. Confirm 9 feet is still your mounting height.
Now mark it. Measure 9 feet up from the patio floor and snap a chalk line. Drop 8 inches below that line and snap a second one. That lower line is where your brackets go. If you’re adding a hood, drop 9 inches instead.
Level that second line across the full width. All your brackets follow it.
Step 2: Final Pre-Drilling Checks
Stop before the drill comes out. If you have an HOA, get written approval first. Some restrict colors, sizes, or placement. Check with your local building department on permits, too. Most retractable awnings don’t need one, but some areas do.
Mark your studs across the full mounting width. Flag any downspouts, outlets, or fixtures that sit in the bracket zone. Move them if you can. Work around them if you can’t. Either way, sort it now.
Step 3: Prepare the Mounting Surface
Every wall type needs different prep.
Wood siding: Find the studs. That’s it.
Stucco: Drill carefully. Stucco cracks. Use masonry anchors rated for your awning’s weight.
Vinyl or aluminum siding: These won’t hold brackets on their own. Fasten a pressure-treated 1×4 board into the studs behind the siding first. Drill through the siding just enough to seat the board, not all the way through for the bracket. Once the board is up, wrap J-channel flashing around all four sides so that water runs off the wall rather than behind it.
Brick or concrete: Skip the lag bolts. Use masonry bolts only.
Check that the surface sits flat across the full bracket span before moving on. Any gap or bow in the wall shows up in the awning frame later.
Step 4: Mount the Wall Brackets
Set each bracket on the lower chalk line. Drive the 4-inch lag bolts into the studs. Use masonry bolts where the wall calls for it.
Tighten until firm. The second you feel the wood start to give, stop. Stripped threads mean a weak mount, and a weak mount fails under load.
Run a level across every bracket before moving on. One bracket off by even a little and the whole awning hangs crooked.
Step 5: Lift the Awning into Place
Know the weight before you start. Smaller SunSetter models run around 60 pounds. Wider ones push past 200. Two people work for most sizes. Go to three for anything 17 feet or wider.
Lift with the fabric and roller bar facing up. Slide the square bar into the brackets and push it in fully. Put the retaining bolts in right away. A loose awning in open brackets can shift and fall before you reach it.
Step 6: Install the Hood
This step only applies to XL and Pro Series models with an aluminum hood. Measure the space above the roller bar first. You need 11 inches minimum. If it’s tight, sort that before lifting the hood into position.
Once mounted, the hood keeps sun, rain, and debris off the fabric every time the awning closes.
Step 7: Set the Pitch
SunSetter ships every awning with a 29-inch drop from the top of the bracket to the front bar. At a 9-foot mount, you get about 6 feet 6 inches of clearance when fully open.
If water pools on the fabric after rain, the pitch needs more angle. Close the awning, loosen the arm clamp nuts, and turn the set screws with an Allen wrench until the slope sheds water cleanly. Tighten everything back when done.
Most people skip this step. Most people also end up with a sagging pool of rainwater on their awning after the first storm.
Step 8: Test and Check All Hardware
Extend the awning all the way out. Watch for uneven movement, fabric that catches, or a frame that sits off-level. Fix anything now while it’s easy.
Retract it fully. Go back along every bracket and bolt by hand. Tighten anything that shifted during the lift. Push the roller bar in both directions to confirm it’s locked in the brackets and won’t move.
Done.
Common SunSetter Installation Mistakes
We see the same handful of mistakes on awnings across San Diego, year after year. Almost all of them trace back to rushed planning, not the actual mounting.
- Mounting too low, which kills headroom, once the awning’s pitch drops it further
- Drilling straight through vinyl siding instead of using mounting blocks
- Overtightening lag bolts until the wood threads strip out
- Skipping the level check across all brackets before lifting the awning
- Forgetting to tilt the pitch for rain runoff after installation
- Using wood lag bolts on stucco or masonry instead of the correct anchor
- Lifting a 17-foot model with only one person
- Missing a stud and anchoring into drywall or sheathing alone
- Leaving the plastic safety sleeves on the arms during the lift, which can hide a bent part
- Mounting near a downspout or window trim that blocks full extension
Important Safety Considerations
Never lift the awning alone. Keep the area below the awning clear while testing it open and closed. Double-check that every lag bolt or masonry bolt is fully tight before releasing the lift. Don’t operate a motorized model until the electrical connection has been checked by a licensed electrician.
Maintenance After Installation
Clean the fabric every few months with mild soap and lukewarm water. Skip harsh cleaners, since they wear down the coating.
Check the retaining bolts twice a year. Wind loosens them slowly, so a quick check in spring and fall catches it early.
Retract the awning before storms. A motorized model with a wind sensor does this automatically.
Leave the awning mounted all year. SunSetter fabric handles outdoor exposure, so you don’t need to take it down for winter.
When to Hire a Professional Installer
Call a professional if your home has stucco or brick, since the wrong hole can crack the surface. Call one if the awning mounts above a second story, since the fall risk is real. Call one for a motorized model, since the wiring needs a licensed electrician. And call one if you don’t have a second person to help lift.
We handle all of this directly, starting with a wall assessment most DIY guides skip.
FAQs
How Long Does SunSetter Awning Installation Take?
Two to three hours, usually. If you’re dealing with roof brackets or your wall needs extra prep work first, it can stretch to four or five.
Can I Install A SunSetter Awning On Vinyl Siding?
You can, just don’t drill straight into the siding. Put mounting blocks behind the brackets so they’re anchored to the actual framing, then wrap J-channel flashing around them to keep water out.
How Many People Do I Need To Install A SunSetter Awning?
Two, minimum. Get three if it’s a wider model. Marking and mounting the brackets is a one-person job, but the awning itself can weigh nearly 200 pounds, and you don’t want to be holding it alone.
What Is The Minimum Mounting Height For A SunSetter Awning?
7 feet 6 inches, measured from your patio floor to the bottom of any roof or overhang. SunSetter pushes you to go higher when you can, though 9 feet gives you the best headroom once it’s extended.
Can SunSetter Awnings Handle High Wind?
Not really, no. They’re fine in a normal breeze, but a hard gust can bend the arms. If a storm’s coming, or it’s just windy, retract it. Same if you’re heading out of town for a few days.
Do I Need An Electrician For A Motorized SunSetter Awning?
Most of the time, no. The cord on motorized models is long enough to reach a regular GFI outlet outside, so you plug it in, and you’re done. Only call an electrician if you want it hardwired, or there’s no outlet anywhere nearby.
Let’s Enjoy Shade Without the Installation Hassle
Most homeowners get stuck on the same two things: lining up a helper for the lift and picking the right anchor for their wall type. Get both right before you start, and the rest of the install moves fast.
If a ladder and lag bolts aren’t your idea of a Saturday, we’ll install it for you in about an hour, wall assessment included. Call Awnings San Diego or check our awning options to find the right size for your patio, deck, or balcony.