
With its durable marine-grade aluminum, UV protection, and long-lasting solution, the metal awning is the best choice for San Diego. This is one of the best solutions to block the harsh heat of summer and Natural disasters like rainstorms.
However, compared to other awning types, Metal awnings are a bit more complex to install if you do it by yourself. Well, we said it is difficult but not impossible; for that reason, today we are going to share with you a step-by-step guide on how to install Do-It-Yourself Metal Awnings.
Key Takeaways
- For DIY Metal Awnings, you should know how to plan, the metal cutting process, and how to attach the metal parts perfectly.
- Do-it-yourself metal awnings will save some money from your pocket on labor costs, but you may need to spend on buying new tools or renting.
- With DIY Metal Awnings, you can easily customize the design in your own way.
- After knowing DIY Metal Awnings, you don’t need to pay extra for maintenance because you know the process, so it will be easy for you to fix the issues.
Why Should You Build Your Own Metal Awning?
In one sentence, there is nothing like a metal awning; it is durable, has low maintenance costs, and protects from the sun’s heat and harsh weather. It allows you to customize it easily on your way. So it was just a beginning. Now take a look below, and learn more about the key reasons you should build your own metal awning.
Longevity & Durability
This is the main reason that you should install this metal awning. There are 4 types of materials used in galvanized steel, copper, steel, and aluminum. Moreover, this will protect your home from rain, snow, strong winds, and intense UV rays.
Weather & Sun Protection
A Metal Awning will keep your building safe from dust, sunlight, and bad weather. However, Metal awnings that are made of marine-grade aluminum are best for the weather conditions of San Diego.
This is highly resistant to corrosion and protects the city from coastal salt air and UV rays. Last year, there was a historic rainstorm in January 2024, and it can repeat in the future, so a solid and strong awning will protect your home.
Cost Savings
When you do a metal awning by yourself, it will save you a lot of money. Moreover, this will also save you time on hiring and finding professionals.
Customization
If you install the metal awning by yourself, then you will get total control over design, materials, and style. However, this is one of the main benefits of DIY metal awnings. Moreover, it will give you the freedom to fix it.
Low Maintenance
When you know the procedure of do it yourself metal awning, then you will automatically find out the minor issues and can fix them easily. However, this one saves a lot of money.
Energy Efficiency
A Metal awning can save a lot of money on electricity, especially during the summer. It will reduce the temperature of the room inside and keep it cool from the inside. Moreover, on the opposite side, during winter and the rainy season, this awning will help you to keep the temperature inside.
DIY Metal Awnings, Tools & Materials
Please pay attention to this section because if you miss something from here, then it could waste the entire effort and work. We are now going to share with you the list of parts and tools for metal awnings that are needed. See the table below and take a screenshot to save the list.
| Item | Category | Options |
| Metal Sheets | Material | Galvanized steel (rust-resistant), Aluminum (lightweight), Polycarbonate-coated steel (durable, weatherproof) |
| Ledger Board | Material | Pressure-treated wood, Laminated veneer lumber |
| Fascia Board | Material | Pressure-treated wood, Hardwood |
| Rafters | Material | Pressure-treated wood, Engineered wood |
| Diagonal Braces | Material | Pressure-treated wood, Engineered wood |
| Structural Screws | Material | Heavy-duty wood screws, Exterior-coated screws |
| Lag Bolts | Material | Galvanized lag bolts, Stainless steel lag bolts |
| Self-Tapping Screws | Material | With rubber grommets for waterproofing, Stainless steel for rust resistance |
| Flashing | Material | Aluminum flashing, Galvanized steel flashing |
| Sealant | Material | Exterior-grade silicone, Polyurethane sealant |
| Paint or Stain (optional) | Material | Exterior wood paint, Weatherproof stain |
| Measuring Tape | Tool | Standard 25ft tape, Heavy-duty retractable tape |
| Stud Finder | Tool | Electronic stud finder, Magnetic stud finder |
| Pencil/Marker | Tool | Carpenter’s pencil, Permanent marker |
| Chalk Line | Tool | Powdered chalk line tool |
| Level | Tool | Bubble level, Laser level |
| Protractor/Angle Finder | Tool | Digital angle finder, Manual protractor |
| Carpenter’s Square | Tool | Steel framing square, Speed square |
| Miter Saw | Tool | Compound miter saw, Sliding miter saw |
| Circular Saw | Tool | Circular saw with metal-cutting blade |
| Drill / Hammer Drill | Tool | Cordless drill, Hammer drill for masonry |
| Impact Driver | Tool | Cordless impact driver |
| Wrench/Socket Set | Tool | Adjustable wrench, Ratchet socket set |
| Rivet Gun (optional) | Tool | Hand rivet gun, Pneumatic rivet gun |
| Screwdriver | Tool | Manual screwdriver, Electric screwdriver |
| Safety Gear | Tool | Safety glasses, Work gloves, Ear protection, Helmet |
So, we hope you got all the required tools and materials required for installing the Metal awning. Now, you may have a question about when I need them and how to make awnings myself. Don’t worry, today Awnings San Diego will hide nothing and brief you on everything that you need to know about DIY metal awnings.
6 Step-by-Step DIY Metal Awning Guide
Now we come to a stage where you will find the steps, tools, and materials you need to install a DIY metal awning. However, after reading this process, you will definitely learn how to do it, but still, you have to agree that there is a difference between a professional and an amateur because of the awning mechanism, so keep this in mind. Now let’s have a look below and follow the process.
Step 1: Measure and plan
Before starting the main part, let’s take a look at the table below. To know the materials and tools that are needed to complete this part.
| Materials | Tools |
| Ledger Board | Measuring Tape |
| Rafters | Carpenter’s Square |
| Diagonal Braces | Chalk Line |
| Fascia Board | Stud Finder |
| Pencil / Marker | |
| Level | |
| Protractor / Angle Finder |
First unit to start by measuring the window and door size where you want to install the awning. While doing this, you need to extend the coverage beyond the sizes of the window and door. Now use a Chalk and point out the accurate lines by using measuring tapes and a carpenter’s square.
After that, you need to take the stud finder to detect any wires under the area where you are going to put the ledger board. Once everything is set, attach the side support rafters and diagonal brackets for extra support.
Note: During this first stage, wear a safety helmet and gloves for protection.
Step 2: Cut the frame pieces
To complete this stage, you need several materials and tools that we mentioned earlier, but we are now specifying them in the table below.
| Materials | Tools |
| Pressure-treated lumber (ledger, fascia, rafters, braces) | Tape measure |
| Outdoor wood screws or nails | Miter saw |
| Metal brackets/joist hangers | Level |
| Anchors/bolts | Power drill with bits |
| Wood sealant or exterior coating | Hammer |
| Carpenter’s square |
During this phase, you need to cut the lumber and attach the ledger board to the wall. Now, put the fascia board in the front section and attach the rafters in the outer part for extra support. To complete the process, you will need tools like a miter saw, level, drill, hammer, screw, and nails.
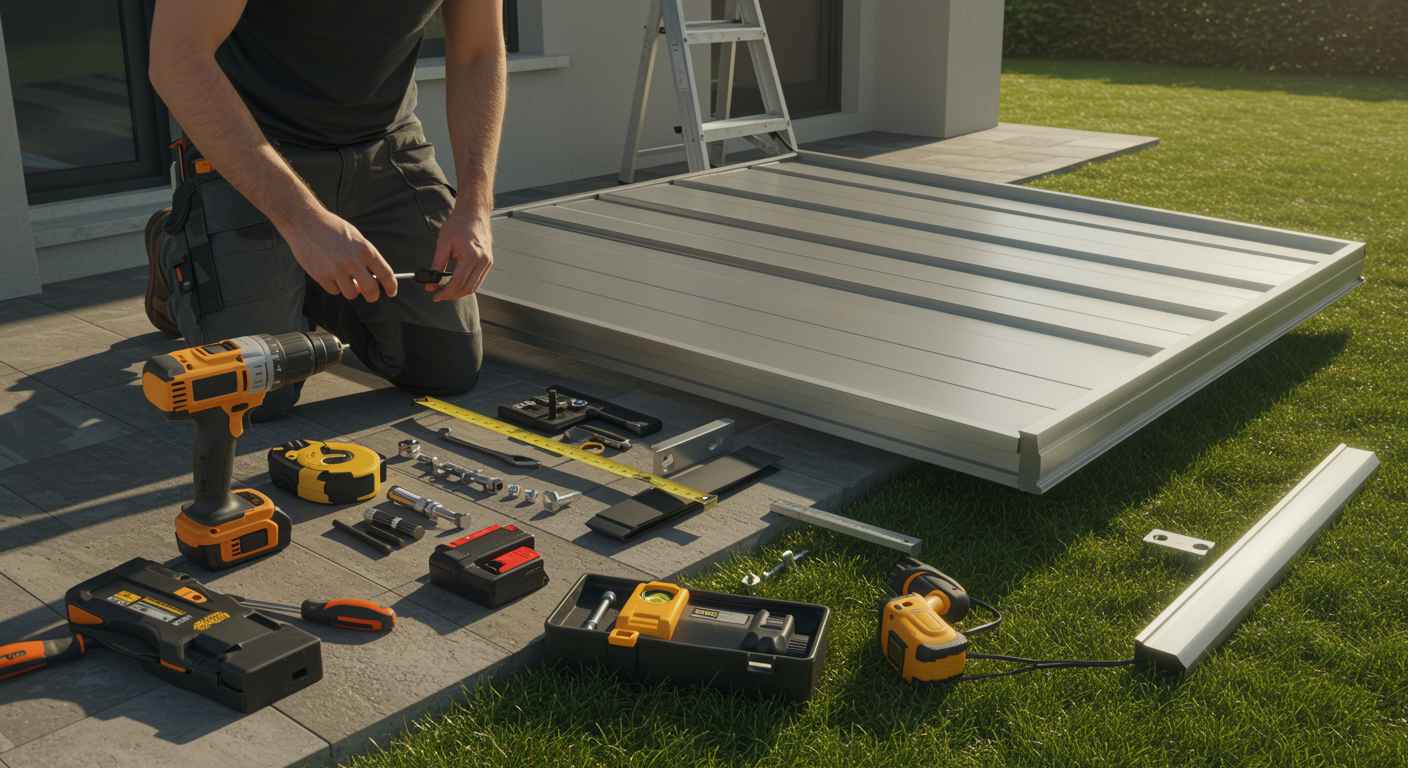
Step 3: Assemble the frame
Beyond the listed tools and materials for this phase, you may need some other equipment from the previous process. However, here is the list below to know more.
| Materials | Tools |
| Pressure-treated lumber (ledger, rafters, fascia, braces) | Impact driver |
| Structural screws | Drill bits |
| Metal brackets/joist hangers | Tape measure |
| Wood sealant or exterior coating | Level |
| Anchors/bolts (if attaching to wall later) | Carpenter’s square |
| Clamps |
For assembling the metal awning frames, first you need to lay out all the pieces on the ground and attach them with screws with the driver. After attaching them to fascia boards, use rafters to give extra strength to stabilize them. Now, add diagonal braces from the ledger board to the rafters for more stability.
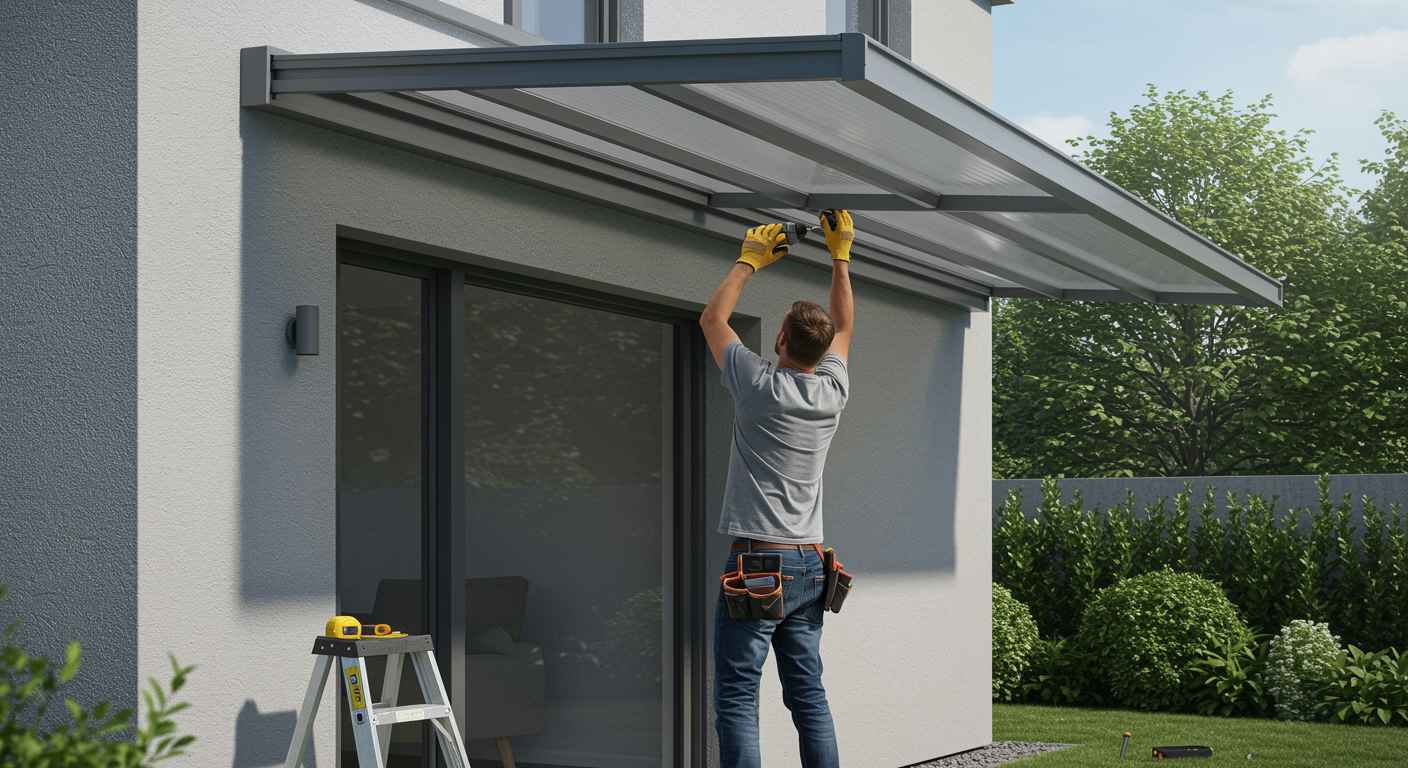
Step 4: Install the frame on the wall
Well, apart from all the materials and tools that are mentioned below, you may need the assistance of someone who can help you lift the frame. Now, take a look below to know about the required materials and tools that are needed for this stage.
| Materials | Tools |
| Pressure-treated lumber (braces) | Power drill with bits |
| Lag bolts | Impact driver |
| Anchors (if needed) | Socket wrench |
| Wood sealant or exterior coating | Tape measure |
| Level | |
| Ladder |
If you have an assistant, then take the assistance of your partner and lift the frame into the position and hold it steady. Now, take the drill and make a hole in the marked position, but make sure you drill in the right position; otherwise, it could be the reason for serious damage.
Once the frame is secure, attach the diagonal braces to the wall and the outer rafters for stability. With this step, half of your job is done.
Step 5: Attach the metal roofing
Now you need to be more sincere, and if you make a mistake here, then it could waste your money. Here is the list of tools and materials that you need to attach the metal roof.
| Materials | Tools |
| Corrugated metal roofing panels | Circular saw with metal-cutting blade |
| Self-tapping screws with rubber grommets | Power drill or impact driver |
| Wood sealant or exterior coating | Tape measure |
| Clamps |
Check and measure the frame again and make sure it is fitted perfectly and is properly aligned. However, as a human and a nonprofessional, you can make some mistakes in framing, and this is the reason we are suggesting you cut the metal sheets after rechecking them.
Now, first cut the metal sheets to the specified sizes using a circular saw. Once you cut down the sheets, place them on the top of the wooden frame and attach them with self-tapping screws with rubber grommets, which will make them waterproof.
Step 6: Seal and finish
This is the final stage, but you may need to spend a few more times to complete the final step. Here are the materials and tools you need to finish the step.
| Materials | Tools |
| Flashing | Caulking gun |
| Exterior-grade sealant | Paintbrushes or rollers |
| Primer | Ladder |
| Paint or wood stain | Tape measure |
This stage is all about making it waterproof and durable, and decorating it with colors. First, you need to put the flashing at the top where the awning is attached to the wall. After that, add a line of exterior sealant to stop leakage behind it.
However, if your frame is made of wood, apply a coat of primer followed by paint and stain to match your house’s aesthetic. Though the entire process looks very simple, it will still be a good idea to take assistance from someone like Awnings San Diego for professional assistance.
Cost Breakdown: DIY vs Professional
Without any doubt, DIY metal awnings are more cost-friendly than professional assistance. But you may think that you can only make savings on hiring professionals. So, as we promised earlier, we will not hide anything from you today, so let’s have a comparison so you can save money.
| Factor | DIY Metal Awning | Professional Metal Awning |
| Cost | Lower upfront cost as you skip labor costs, but you still pay for materials and tools | Higher upfront due to labor, expertise, and overhead |
| Materials & Tools | You must buy or rent all tools and supplies, which can add up | Professionals have access to better tools and materials included in the cost |
| Time | Takes a lot of your own time to learn, prepare, and build | Completed quickly and efficiently by experts |
| Quality & Mistakes | Mistakes can cost extra for fixes or replacements | Work is done right the first time with high-quality results |
| Future Upgrades | May need professionals later to fix or improve the project | Usually built to last and meet your needs without extra upgrades |
| Predictability | Timelines and outcomes can be uncertain | Timeline and results are more predictable |
| Hidden Costs | Mistakes or missing materials can increase the cost | Usually all-inclusive with no surprises |
How to Select Design & Style Ideas for DIY Metal Awnings?
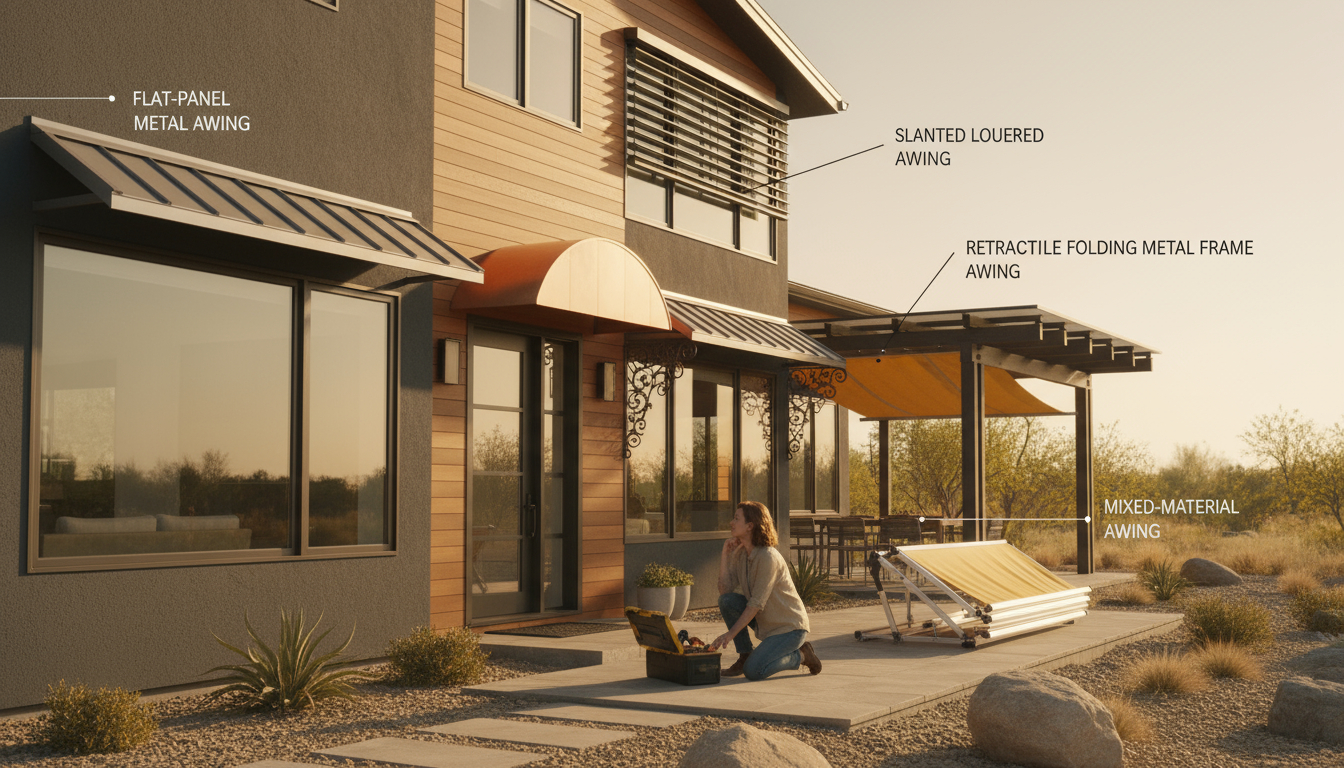
This is a tricky part, and you need to analyze several points while selecting one. Sometimes you may get confused while choosing one. However, if you are too confused, then you can take an expert’s assistance from someone like Awnings San Diego for the best design and style that will match your needs. Now take a look below and know which area you should keep an eye on.
- Select the Purpose of Your Awning
- Match It with Your Home’s Style and Taste
- Choose the Right Metal and Finish
- Collect Inspiration and Design Ideas
- Make sure the design has DIY-friendly features.
Safety & Maintenance Tips
Ok, so till now we have mentioned all the points about DIY metal awnings, but what about safety and maintenance? Don’t worry, this will take only one minute to read. Just take a look at the table below, and learn the safety and maintenance tips together.
| Safety Tips | Maintenance Tips |
| Check and tighten bolts before storms. | Wash dirt and dust off regularly. |
| Keep the awning slightly tilted for water flow. | Spray with a hose to clear loose debris. |
| Take it down or clear snow if it piles up. | Use mild soap and warm water for cleaning. |
| Trim trees and plants nearby to avoid leaves and dirt falling on it. | Scrub gently with a soft cloth or brush. |
| Rinse well and let it dry to stop rust. | |
| Look for rust or loose parts every season. | |
| Add a protective coating or wax for longer life. | |
| Clean stubborn stains with soap and water, then rinse and dry. |
FAQ
How long do metal awnings last?
On average, a metal awning lasts about 20-30 years. But the lifespan of the awning can go longer or shorter due to several factors, like maintenance, metal type, and proper installation.
What is the best metal for awnings?
Aluminum is the best material for metal awnings. Due to its lightweight and corrosion resistance and easy installation, it has been made perfect for metal awnings.
How to protect an awning in high winds?
To protect an awning, the easiest way to save it is to retract it immediately. However, if the retraction is not possible, then reduce the awning’s surface area a little bit.
Conclusion
Finally, we hope you understand how to do it yourself metal awnings. Though it might save some money, it could still be costly if you make a mistake. So, before taking the final decision, think about your capability again; otherwise, it could be a reason for costly damage. Thanks for your valuable time. For more updates on awnings, contact us anytime.

