

To build a DIY retractable pergola canopy, measure your pergola, pick the right system, and choose the correct fabric. Use essential hardware like stainless steel cables, turnbuckles, and curtain clips to create a smooth sliding system. Secure each anchor point and adjust the cable properly for easy movement. A basic setup can cost $200–$500
A retractable pergola canopy is one of the smartest outdoor upgrades a San Diego homeowner can make. For this, you will need a proper guide to make a retractable pergola canopy. Read our guide to know the detailed steps, since there are important factors you must know to use it effectively in San Diego.
What Is a Retractable Canopy?
A retractable canopy is a flexible outdoor shading system that you can attach to pergolas, decks, or patios. It can be opened or closed manually or automatically to provide sun protection, light rain cover, or extra privacy. Retractable canopies are cost-effective and require no major changes to your outdoor structure. It makes your space more comfortable and versatile year-round.
The thing is far different from the fixed setting that always blocks sunlight and air. Rather, a retractable canopy lets you choose when to let sunlight in or keep it out. You can adjust the airflow under the pergola.
It is mainly built with three core components: the framework, the fabric design, and the manual pull-cord or a motorized remote-control system that bunches the fabric at one end when not in use. The retractable canopy also has some smart usability.
- On a hot day, just opening the canopy can drop the temperature of a deck or patio by 10–15 degrees.
- Beyond sun and light rain, many retractable canopies can protect against moderate wind,
- It helps reduce UV exposure and even sheds water when you are slightly angling it.
Essential Considerations Before Starting Your Retractable Pergola Canopy Project
- Always choose 300g/m² UV-resistant acrylic as your minimum fabric weight.
- You have to plan for installing your canopy in an east-west facing direction, as it helps maximize afternoon shade coverage.
- A DIY retractable canopy costs $500–$1,200 compared to $2,500–$6,000 for a professionally installed commercial system. But along with saving cost, you are likely giving up some higher-end systems, as we mentioned earlier in this blog.
- Though commercial canopies are designed with motorized gear systems, you can use a simple rope, wire, and track in the DIY version.
- You will find every component available at nearby hardware stores or trusted online shops.
- Standard pergola with retractable shade canopy DIY cloth blocks 70–90% of sunlight, but not 100%. So the best you can choose is 90%+ shade-block fabric minimum to keep pace with the temperature in heat zones like El Cajon and Escondido.
How To Build A DIY Retractable Pergola Canopy (Step-by-Step)
You can retractable pergola canopy by installing stainless steel cables or tracks across the pergola. Then attach weather-resistant fabric panels with clips or rods and adjust the tension with turnbuckles. Test the sliding mechanism, secure hardware, and ensure smooth operation for adjustable shade and outdoor comfort.
Tools and Materials Needed for a Reliable DIY Retractable Canopy For Pergola
To build a durable pergola retractable canopy DIY, you will need quality tools for precise cuts and tensioning. Here is the detailed tools and materials list you may need:
| Tool | Specification |
| Power Drill | 1/8″–1/4″ bits, 8–15 ft-lbs torque |
| Laser Level or Bubble Level | 4-ft minimum |
| Cable Crimper / Swager | Standard sizing |
| Wire Cutters | Heavy-duty |
| Measuring Tape | 25 ft minimum |
| Chalk Line | Standard |
| Stud Finder | Standard |
| Ladder | 8–10 ft |
| Safety Harness | Standard |
| Heavy-Duty Sewing Machine | Industrial grade or outsource to a local canvas/upholstery shop |
Core Materials
| Category | Materials | Size / Spec | Quantity (10×12 ft) |
| Frame Hardware | Stainless steel cable (316 marine-grade) | 1/8″ diameter | 120 ft |
| Eye bolts | 3/8″ | 12 bolts | |
| Turnbuckles | 3/8″ x 6″ | 6 turnbuckles | |
| Tracks / Rollers | Aluminum I-track | 2–3″ wide | 40 ft |
| Roller wheels (nylon) | 4–6 per panel | 20 rollers | |
| Fabric | UV-resistant acrylic (Sunbrella or equivalent) | 90% shade block, 300g/m² | 150 sq ft (add 10% overlap) |
| Fasteners | Brass grommets | #10 size | 35–50 grommets |
| Stainless screws | 1/4″ x 2″ | 100 screws | |
| Pulley kit (rope/cord) | UV-rated | 2 pulleys |
San Diego Tip:
If you’re in Oceanside, La Jolla, or Coronado, choose stainless steel or coated hardware over standard zinc/aluminum. This is because salt air and the extreme heat of the city can accelerate rust and corrosion significantly.
Step-by-Step Guide to Make a DIY Retractable Pergola Canopy
Let’s learn how to build a DIY retractable pergola canopy with step-by-step instructions and professional guidance:
Step 1: Measure the Pergola Area
This is where every successful canopy project stands, even where most DIY mistakes happen. Here is what you have to measure to make things effective:
Measure the full length and width of your pergola at beam level. For a standard 10×12 ft pergola, you have to set your tape measure across the top from beam edge to beam edge on both sides. Here, you will get the idea of how many cable runs or tracks you need.
Now subtract 1 inch from each side of your total dimensions. For example, a 10×12 ft pergola becomes 9’10” x 11’10”. Then, mark a chalk line so one end of the canopy is 4–7 inches lower than the other. It will create a 3–5% pitch, and that is important so rainwater runs off cleanly instead of pooling in the center. Once confirmed, add 10% to your fabric order.
Step 2: Plan the Canopy System Design
Now that your measurements are ready, it’s time to fix which system you will actually build.
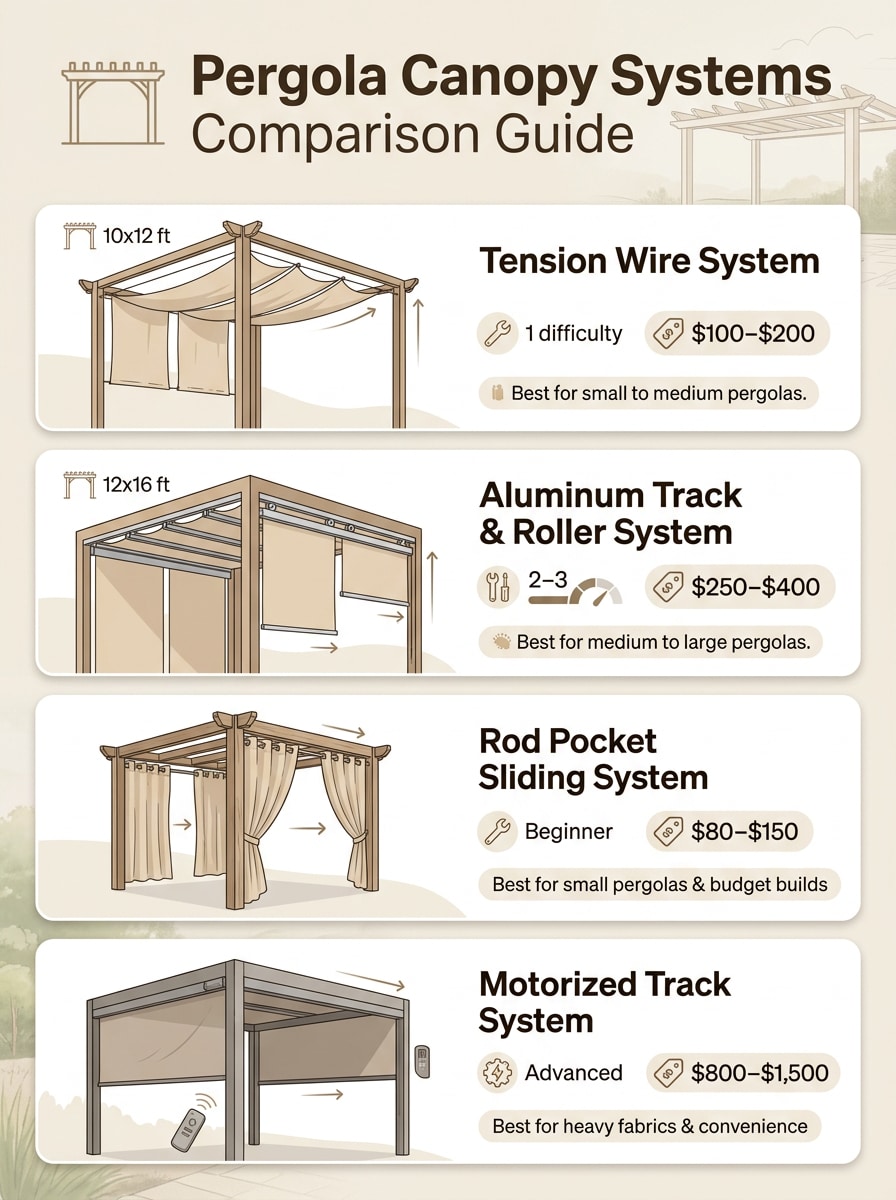
| System | Best For | DIY Difficulty | Approximate Cost |
| Tension Wire | Small to medium pergolas 10×12 ft | Beginner | $100–$200 |
| Aluminum Track & Roller | Medium to large pergolas 12×16 ft+ | Intermediate | $250–$400 |
| Rod Pocket Sliding | Small pergolas, budget builds | Beginner | $80–$150 |
| Motorized Track | Heavy fabrics, convenience | Advanced | $800–$1,500 |
First Time DIYer?
- You can start with the Wire-Guided system, as this needs the fewest tools and the simplest hardware.
- According to the building codes, patio covers such as pergola canopies must be designed to support their own weight plus at least 10 pounds of additional load per square foot.
Step 3: Choose the Right Fabric for Your Canopy
With your system finalized, it’s time to select the fabric. You have to choose the right fabric as it must withstand constant mechanical folding while facing harsh UV exposure.
Now that you will differ fabric options, add in this instance some proper opener idea aligning with the intended details.
| Fabric Type | Shade Block | Water Resistance | Breathability | Lifespan | Cost per sq ft |
| Solution-Dyed Acrylic (Sunbrella) | 90–98% | Excellent | High | 7–10 years | $8–$15 |
| Polyester | 70–85% | Moderate | Medium | 3–5 years | $3–$8 |
| Canvas | 75–90% | Moderate | High | 4–7 years | $5–$10 |
| Shade Cloth (Open Weave) | 50–90% | None | Excellent | 5–8 years | $2–$6 |
Not Sure If Your Pergola Can Handle It?
A quick professional assessment through Awnings San Diego saves you from a costly mid-season failure.
Step 4: Install Your Track, Wire, or Rod System
With your measurements confirmed and fabric on order, at this step, we will build the main structure. Depending on the system you chose earlier, follow the corresponding installation steps below.
i) Wire-Guided System
- Pre-drill corner holes by using a 5/16″ drill bit, and then attach eye bolts to the pergola frame.
- Install turnbuckles onto eye bolts on one side of the pergola.
- Cut the wire rope to the pergola length.
- Next, crimp Nicopress sleeves on both ends to form loops.
- Run the wire through the opposite eye bolts.
- Finally, hook it to the turnbuckles and tighten until taut.
ii) Track-Roller System
Though the process needs for the professional hand, yet you can follow these simple steps:
- Cut tracks to size and screw them onto header beams with equal overhang on both ends.
- Use a level to ensure both tracks align perfectly on the frame.
- Install end stops on both track ends to prevent rollers from sliding off.
- Insert nylon roller wheels into the track before you connect the next section.
iii) Rod Pocket System
This is the most berginenr friendly options. Follow these quick steps:
- Mark and pre-drill bracket positions every 12–16 inches along both beams.
- Connect metal rods and slide them through the canopy’s rod pockets.
- Secure each bracket with 1/4″ × 2″ stainless screws
- Push the rod sideways to confirm it’s firm with no flex before continuing.
Step 5: Attach and Thread the Canopy Fabric
Now that your support system is installed, the canopy fabric can finally go up. Simply lay the fabric flat on the ground. Then start installing the brass grommets every 12 inches along both long edges of the fabric.
When your grommets are ready, start attaching the fabric to your chosen system. Now, simply, depending on your chosen system:
- Slide the glider rings onto the wire.
- Feed rollers into the track channels.
- Or thread the rod pockets over the aluminum rod.
All you have to do is work slowly from one end to the other, keeping both sides even as you go. In case you load one side completely first, the canopy can sag or become misaligned.
Step 6: Test the Retract Mechanism
Your fabric is now installed, so it’s time to test the whole system. Slowly extend the canopy fully and check for fabric bunching, roller jams, or uneven tension. Next:
- Pour a small amount of water in the center.
- Check and confirm that the 3–5% slope drains water correctly.
- Then retract the canopy slowly and make sure the gliders, rollers, or rod pockets move smoothly.
- In case you feel resistance, stop and fix the issue before continuing.
- Finally, run 3–4 full open and close cycles to ensure it runs smoothly.
Design Inspiration and Ideas for DIY Retractable Pergola Canopy
Your retractable canopy for pergola DIY does not have to be just functional. At the same time, you have to focus on the design choices that can turn your pergola into the most used space in your entire home.
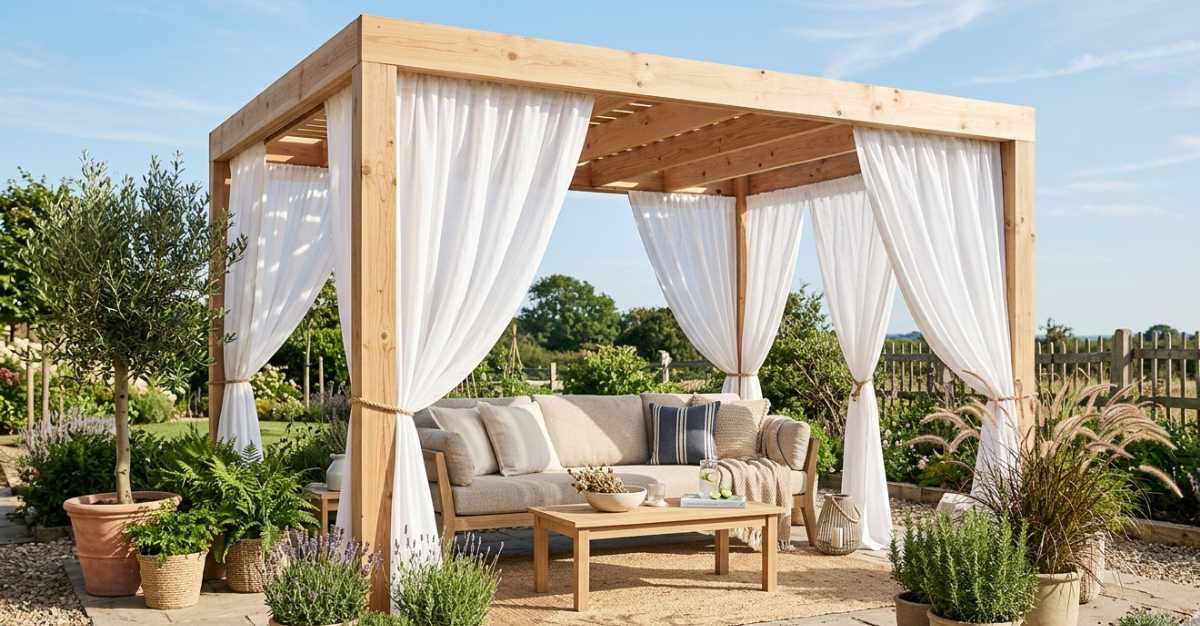
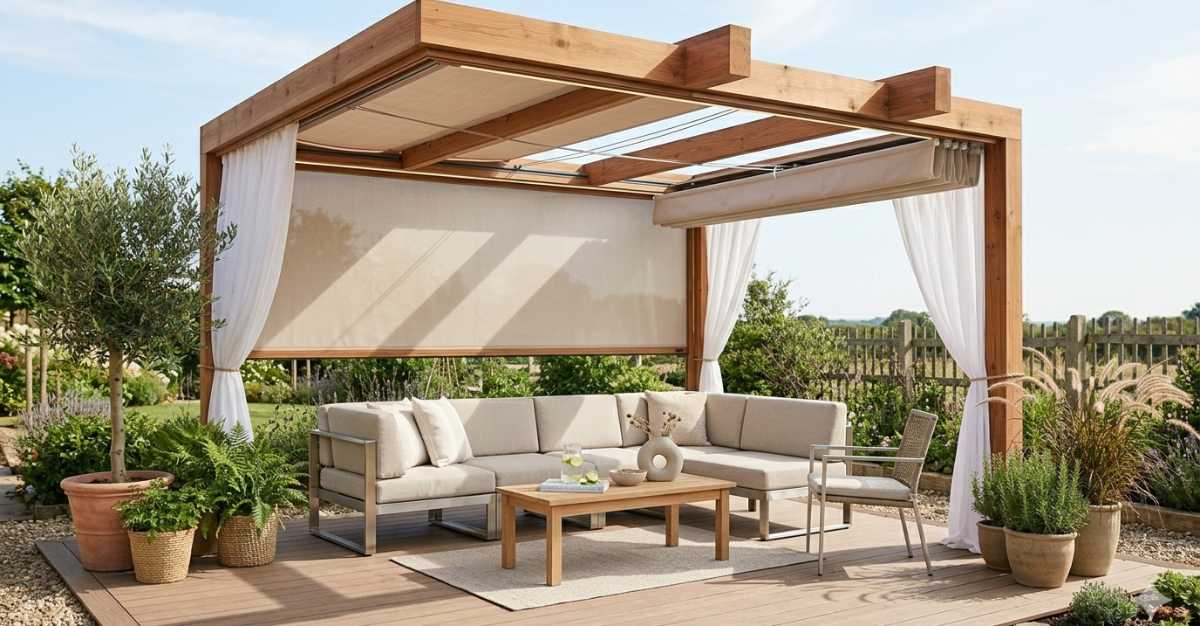
1. Light Wood Pergola With Curtains
A light wood pergola features straight cedar beams paired with white outdoor curtains. Here you will use UV-resistant fabric that blocks sunshine and keeps your San Diego patio cool and comfortable.
2. Layered Pergola
A layered pergola features cedar beams that will be beautifully arranged at different heights for a modern look. Users basically combine it with the UV-resistant canvas fabric. You will get an adjustable shade and airflow that will keep your San Diego deck cooler.
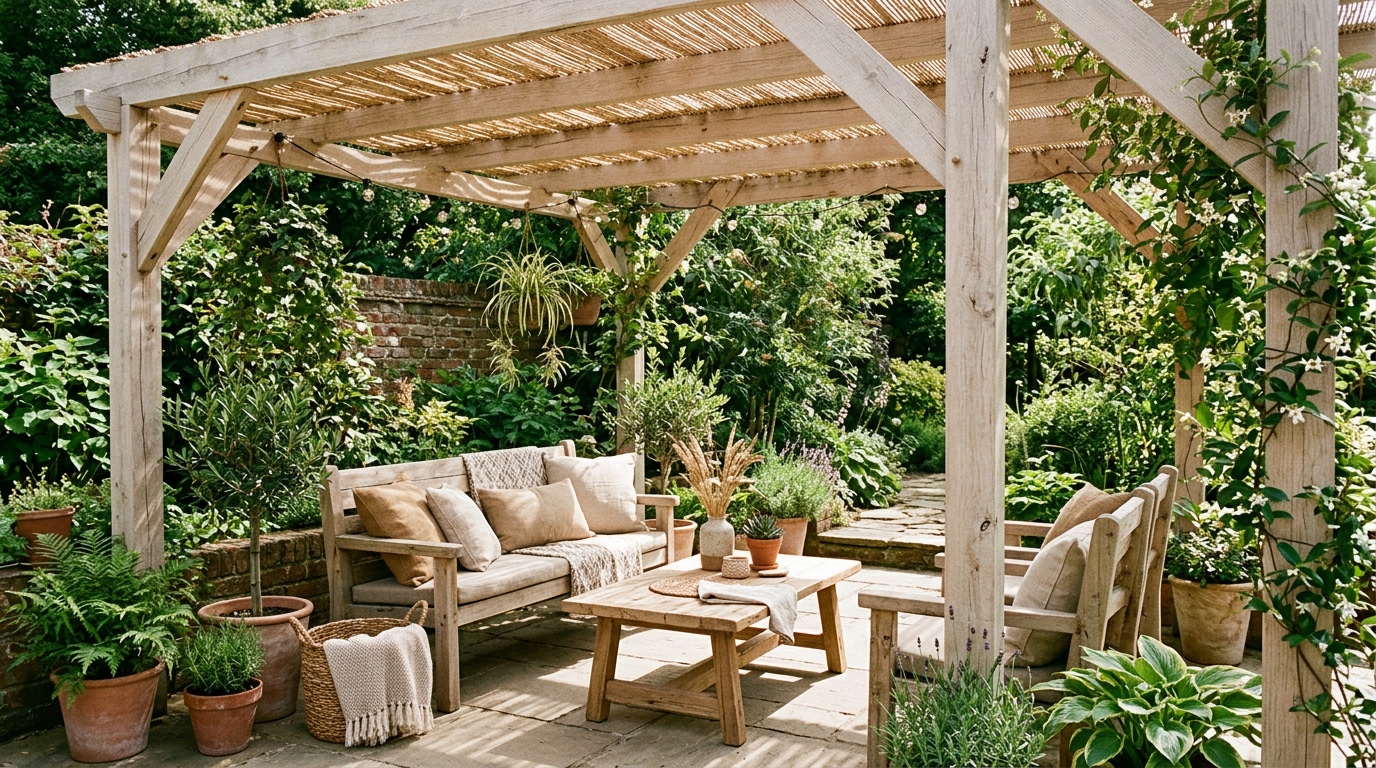
3. Natural Wood Pergola With Reed Mats
A natural wood pergola is built with lightly finished wood that gives you a rustic, earthy appearance. On top of the pergola, woven reed mats are used that give a rustic look. The UV-resistant reeds filter sunlight, offering perfect shade for San Diego’s sunny patios.
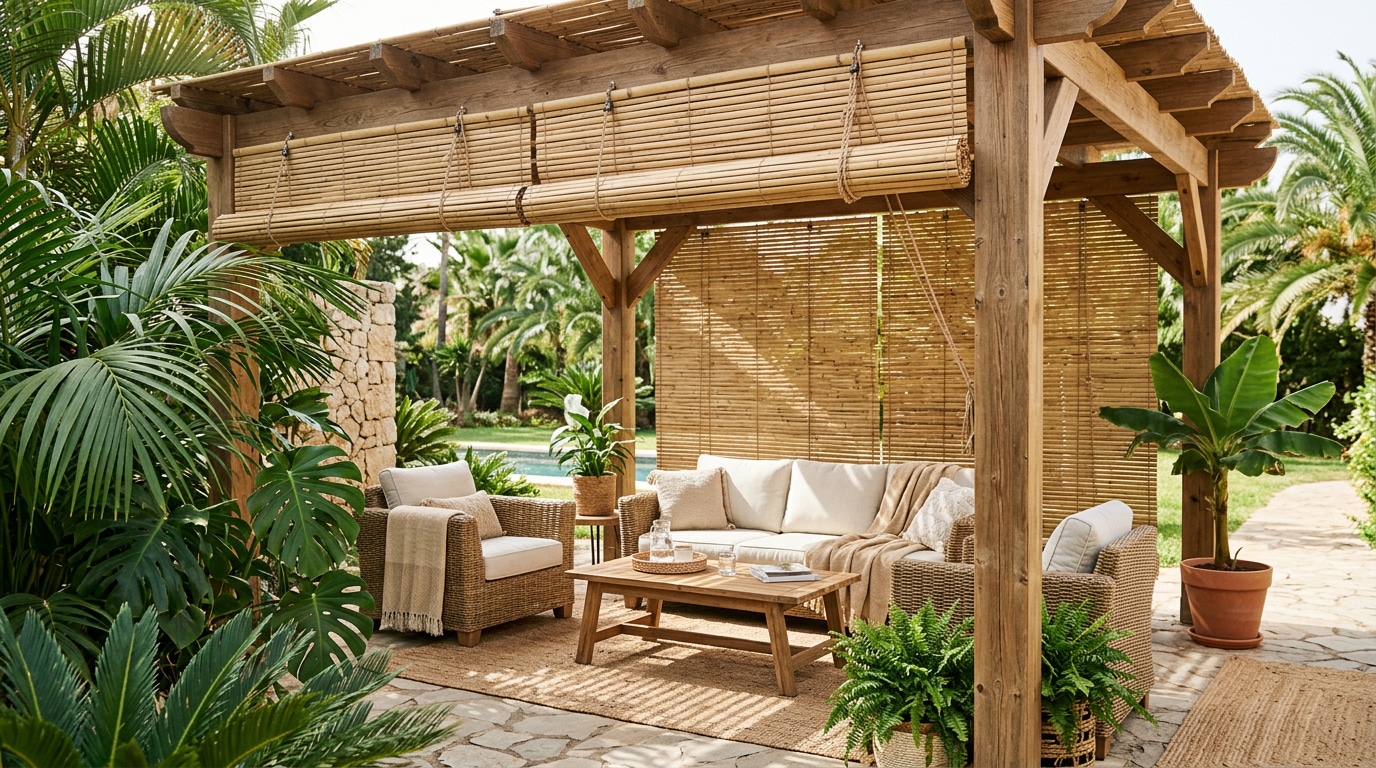
4. Roll-Up Bamboo Shade Canopy
A roll-up bamboo canopy adds a tropical and natural feel to your pergola. The design is made with durable bamboo slats and weather-resistant cords. Due to this, it can easily block harsh sun and keep your San Diego patio cool and breezy.
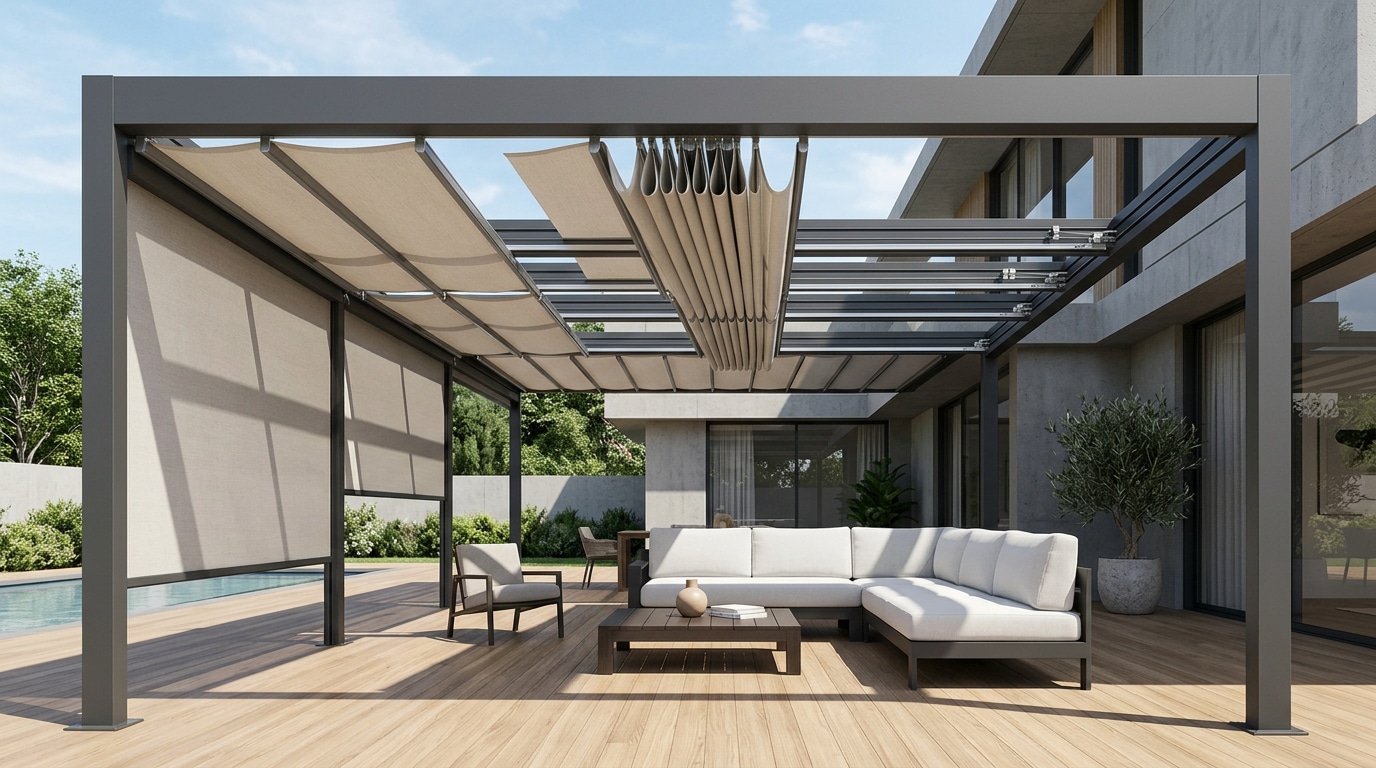
5. Fabric Panel Track System
A roll-up bamboo canopy adds a tropical and natural feel to your pergola. The design is made with durable bamboo slats and weather-resistant cords. Due to this, it can easily block harsh sun and keep your San Diego patio cool and breezy.
Costs and Budget Considerations for DIY Retractable Pergola Canopy
A retractable pergola canopy for a standard 10×12 ft setup costs between $500 and $1,750. However, the actual prices vary depending on the system type, fabric quality, and your specific San Diego location.
| Component | Budget Option | Mid-Range | Premium |
| Fabric (150 sq ft) | $80–$150 (polyester) | $200–$400 (canvas) | $450–$650 (Sunbrella acrylic) |
| Wire/Track/Rod Hardware | $100–$200 (wire-guided) | $250–$400 (track-roller) | $800–$1,500 (motorized) |
| Fasteners & Grommets | $20–$40 | $40–$60 | $60–$100 |
| Tools (if not owned) | $50–$100 | $100–$150 | $150–$200 |
| Total DIY Cost | $250–$490 | $590–$1,010 | $1,460–$2,450 |
Maintenance and Safety Tips You Can Consider for a Pergola with a Retractable Canopy DIY
If you are maintaining it correctly, a retractable pergola canopy lasts 7–10 years. To upkeep the thing, brush off debris weekly and deep clean the fabric every 3 months. Also, you should inspect the hardware monthly and always retract during high winds above 20 mph.
Get the actual expert suggestions:
- Use a soft-bristle brush to gently remove loose dirt, leaves, and debris from fabric.
- Try to clean fabric with mild soap and water every 3 months.
- Must apply silicone-based lubricant to all hinges, joints, and pivot points monthly.
- Inspect all bolts and screws monthly. Try to tighten any loose parts immediately.
- Moreover, tighten any loose parts immediately.
- Inspect pergola frame joints and connections every season.
- Apply waterproof sealant to wooden pergola beams every 2–3 years.
- Also, keep tree branches, vines, and surrounding plants trimmed. This way, they don’t rub against the fabric or block the canopy movement.
- In case you are not using it for a long period, you have to fully retract the canopy to protect the fabric and extend its lifespan.
Common DIY Challenges and Hidden Risks for Installation
If you live near the coast, salt air can quickly cause metal parts to rust.
That’s not even the end. Here are some more DIY challenges we have seen many homeowners face in San Diego:
- It is a serious mistake if you are missing protective coatings, waterproof sealants, and proper drainage. It leads to puddles and rust that slowly damage the structure.
- As a beginner, you might use mismatched fasteners. Using regular steel bolts instead of galvanized ones can cause rust.
- While installing the pergola cover DIY retractable pergola canopy, you must stretch it tightly from one end to the other. Many builders make mistakes here, and the fabric collects rainwater or flaps in the wind.
- Also, DIY installers often void warranties and create safety risks. You have to always check the permits, size limits, and guidelines with local authorities before starting.
- Another common mistake is ignoring local building codes and wind load requirements. Often, non-compliance results in failed inspections, or you may even need to remove it.
Benefits of Hiring Professionals for Installing a Retractable Pergola Canopy
Hiring a professional can save you time and money. Professionals in San Diego, like those you will find at Awnings San Diego, will guarantee your canopy is built to last through San Diego’s heat, wind, and coastal conditions. Here are some more advantages you can ensure:
Correct System Selection from the Start
Professionals first assess your exact location, pergola size, and local climate conditions. Based on that, they can recommend the right system.
Precise Installation With the Right Tools
Professional installers have the specialized tools and hardware that most homeowners simply do not own. Through this, they can ensure the build meets the perfect load requirement.
Local Climate Knowledge Built In
Professional installers understand San Diego’s coastal climate. With their long years of experience, they can select corrosion-resistant hardware and UV-durable fabrics. It ensures your retractable pergola canopy performs reliably.
Compliance With California Building Code
Experts ensure your installation meets California Building Code load requirements and HOA regulations from the start. It protects you from fines or unexpected liability issues.
In Closing
Building a DIY simple retractable canopy for your pergola is absolutely manageable. But this can only be possible when you are very precise with every measurement, material, and anchor point. Otherwise, there is a risk of unstable support or the canopy failing to retract smoothly.
However, if you need a long-lasting and perfectly fitted canopy, the best idea is that you will head to a professional in San Diego. Contact our team today. We’ll help you choose the right retractable canopy solution and install it properly so you can enjoy reliable shade for years to come.
FAQs
When to Build a DIY Retractable Canopy?
The best time to build a DIY retractable pergola canopy in San Diego is late spring through early fall, particularly April to October. This is the time you will get the driest conditions and comfortable temperatures. This helps you continue with efficient outdoor work.
Is There a DIY Retractable Pergola Canopy Kit Available?
Yes, you can easily get ready-made kits available at Home Depot, Lowe’s, and Amazon. The prices usually range from $150–$800 depending on system type and size.
How Long Does a DIY Retractable Pergola Canopy Last?
With quality materials like Sunbrella acrylic and proper maintenance, you can expect a DIY retractable canopy to last 7–10 years.